Having switched scales I have been re-evaluating my approaches to a number of common modelling tasks that I was generally happy executing in 20mm. The first covered in my last post, was stowing vehicles, the second covered in this one is my philosophy for basing. I had intended to include this with a model review but soon realised that the level of change warranted a more detailed piece of its own, if only to set out an approach for me to follow as the project developed.
I have always been a firm believer in baseing vehicles which;
- Protects the model when handled.
- Makes them look good
- Reduces the effort in moving lots of infantry around the table
I always think these factors outweigh the negatives which I tend to think of as:
- The base does not always match the terrain
- They take up more space for storage
- They raise the model up from ground level.
Elements of the negatives are also more easily managed in this scale as the costs of the models are significantly less than in say 20mm, so you could have multiple versions of the same model on different bases for instance, although I think I'd draw the line between a complete set of Urban and Rural based vehicles although I am considering it for the ship to shore elements and some aircraft.


Base Thickness. I like Laser cut MDF bases which are very easy to use, though in this scale there are challenges as the thickness of the bases tends to be around 2mm which is 33% of model height as opposed to 10% of model height in 20mm.
To counter this I rounded the base corners and then chamfered the edge to reduce the visual impact of the thickness when the model is on the table. For some of the bigger bases such as infantry group bases an electric sander is a blessing otherwise a sanding block and or sanding sticks are sufficient to the task.
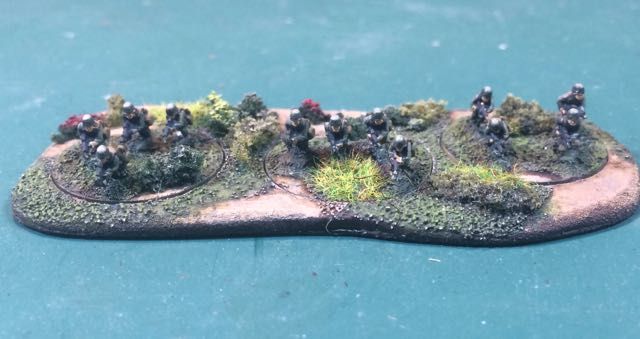
The Infantry movement tray bases are a particular issue as they have a 2mm thick base which has a 2mm thick additional layer with the cutouts in on top. I replace the bottom layer with cardboard which keeps the height increase to a minimum. Care needs to be taken when working the these bases to keep glue and baseing material away from the slots and the edges of the infantry bases. The irregular shaped base elements left over by this approach are used for small groups of trees and scatter terrain.

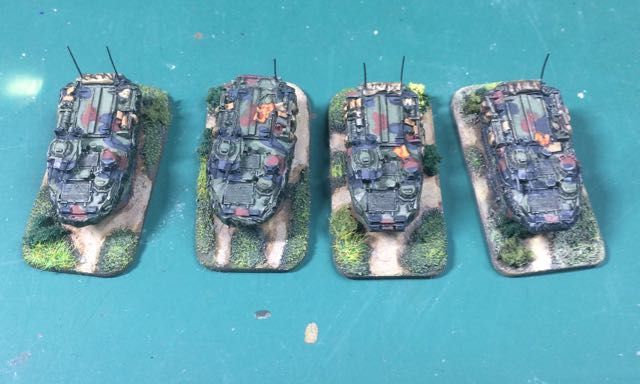
Base Sizes. I think the models look better when you use consistent base sizes for different vehicle types even if the rules don't require it. Currently for my 6mm forces I am using or considering using the following:
- Large Armoured Vehicles, 40mm x 20mm
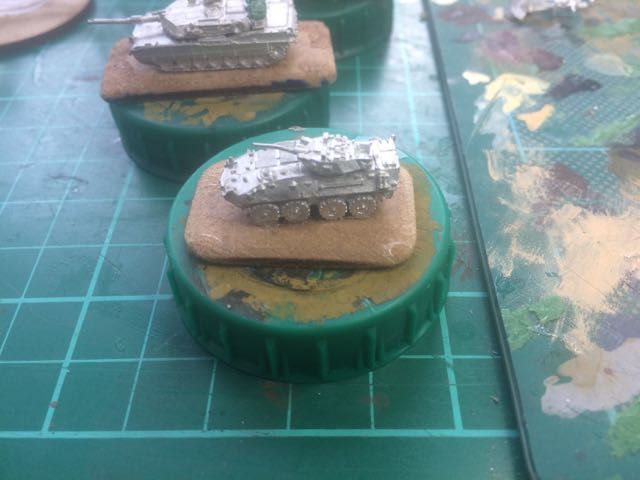
- Small Armoured Vehicles, 30mm x 20mm or 35mm x 20mm
- Large Soft Skins, 35mm x 15mm (yet to use this so may need revising)
- Small Soft skins, 25mm x 15mm
- Aircraft Bases 40mm Diameter
- Artillery Bases, 40mm Diameter
- Infantry teams, 20mm Diameter
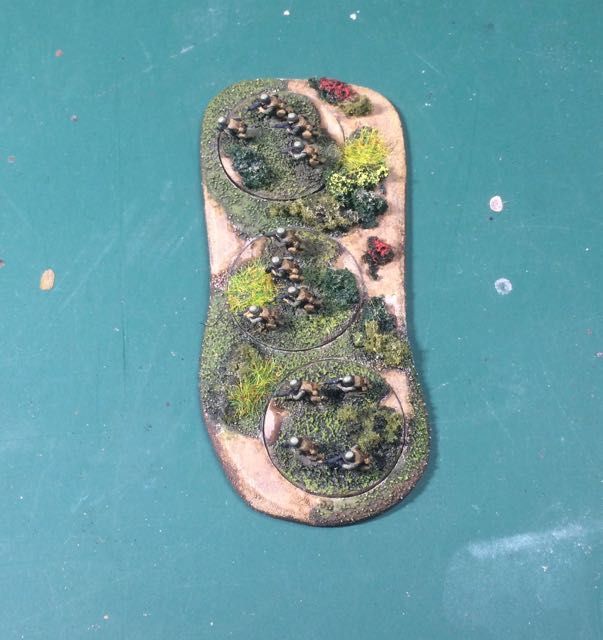
- Infantry Group Bases, Irregular 2 and 3 team pill bases approx 40mm x 80mm
I get all my bases from East Riding Miniatures who are very quick and have a great range of sizes and in this scale that probably covers significant terrain components. In addition they produce to a consistent quality.
Ground Work This of course is an area of personal taste but having modeled in 20mm for so long I thought the groundwork raised further challenges as the materials I had used in 20mm seemed like they would be disproportionate in size for 6mm. Examples include:
- Static grass which is between 1mm and 2mm in length which in 6mm represent effectively very long grass rather than short grass
- Sand particles which I use as texture for dirt surfaces in 20mm seemed to be similarly outsized.

- Dirt Surfaces, Instead of applying sand I just abraid the surface of the mdf base with sand paper to rough it up a bit and add small amounts of fine texture using my new universal best friend, vallejo plastic filler pipped on to the surface. Plastic filler can also be used to blend in the edges of infantry bases if they are on dirt rather than grass. Because of the long applicator nose this is easy to accurately apply.
- Short Grass, Instead of static grass I am using fine sand particles applied on top of white glue. These can also be built up in layers to provide surface variation, I seal it with white glue once the effect has been created otherwise it eats paint.
- Long Grass. Small clumps of static grass, short tufts (2mm) and Turf clumps any or all attached with white glue.
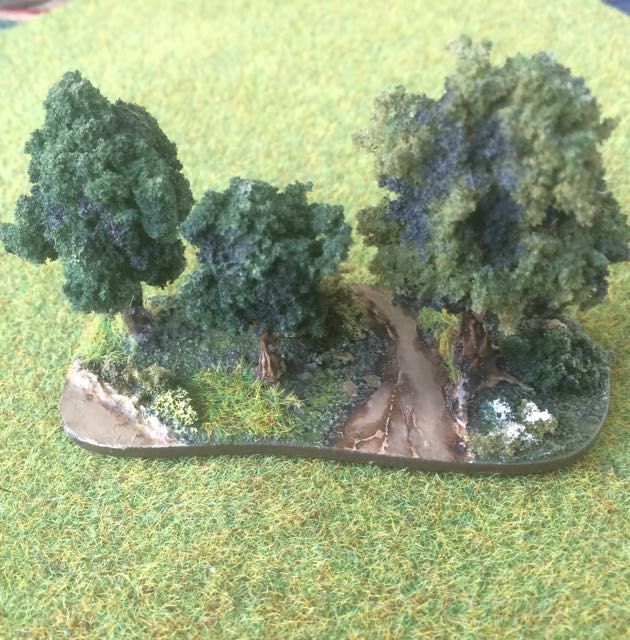
- Shrubs and bushes, I use clump bush material divided into a variety of sizes; 1mm- 2mm for small shrubs and long grass and 6mm - 12mm for large bushes and hedges. I use a contact adhesive to attach it to the base, and then saturate it with white glue so it becomes hard. When the white glue has dried and the bush hardened I then enhance shadow areas with dark green and highlight upper surfaces with buff or light green . These can also be dry brushed with bright primary colours to represent flowers.
- Rocks. I use a variety of material to represent rocks rough sizes are: fine ballest 1-2mm, fish tank gravel 2mm-3mm and garden gravel 4mm - 10m. These are attached using a contact adhesive and painted, washed and dry brushed, with the ground around their base receiving a dark wash to represent shadow.
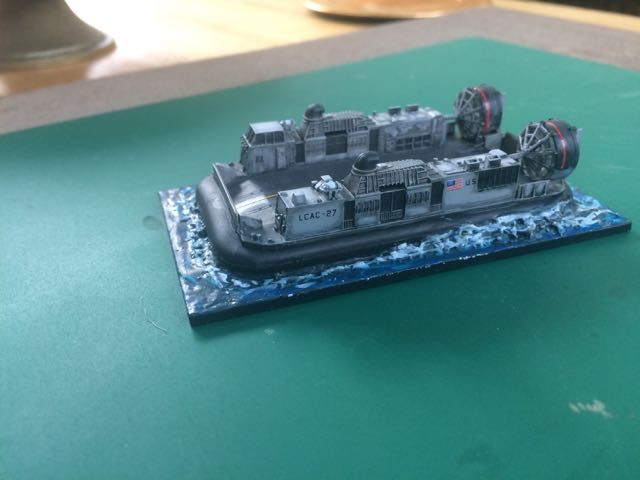
- Sea and River bases. For representing broken water and surface ripples I use the Vallejo plastic filler again which builds up nicely in layers to represent the spray effects at the back of this hovercraft. Once it has dried I give the base a few washes of white glue to provide a smooth surface before painting.
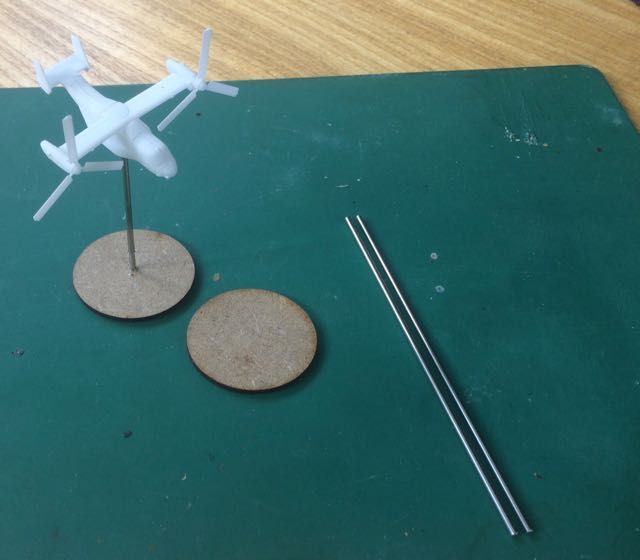
- Air Bases. For aircraft I originally kicked off with the idea of using Coresec bases which are very good but a bit big for 1/350 aircraft which is what I am currently intending to use for the aircraft scale. Wire always strikes me as having potential for getting bent over time, even in reasonably heavy gauges. So I have gone for 2mm stainless steel rods, very strong and a challenge to cut, they need a vice, a pair of bolt cutters and a spare hand but do look very good. I have mounted these in 40mm diameter round bases using a 2mm drill bit and contact adhesive, then the base is prepared as either a land or sea base depending on aircraft role.
Assembly and Production. I use the following assembly sequence to put the model and their bases together, which broadly follows the following sequence:
- Stage 1
- Modify base, Round corners, chamfer edges sand the surface with sandpaper to roughen dirt areas
- Attach vehicles/figures
- Attach based vehicle to painting support (I use plastic bottle lids)
- Stage 2
- Apply sand to base to represent grass areas, layer and seal on completion with white glue
- Stow Vehicles when base dry
- Prime with white primer
- Stage 3
- Paint Vehicles/Figures
- Paint Dirt and Grass
- Stage 4
- Add Scatter Material
- Paint Scatter material as required
- Land Bases I start with a wash of black on grass and brown on the dirt surface, which helps me see. This is then followed by a thin application of the base colour and a follow on black brown wash. Depending on the level of surface texture this is then finished with either dry-brushing or washes of lighter shades of the base colour covering a reducing proportion of the area to be painted leaving the dark edges exposed. The effect can be enhanced on completion with a final wash around the edge and any raised features on completion.
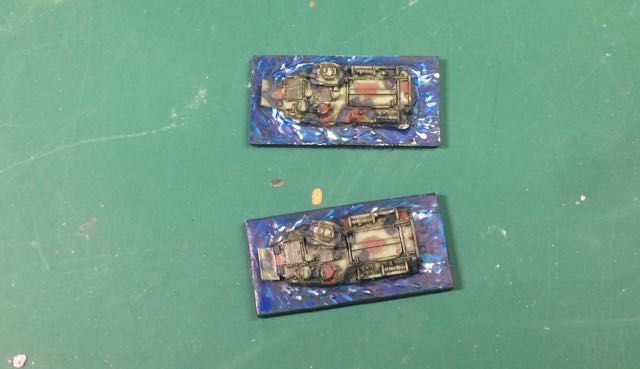
- Sea Bases, I start with a pre-shade of black grey applied to selected areas, I then wash with medium blue followed by adding highlights in blue green before another wash of medium blue and a wash of dark grey. This is repeated until the required effect is achieved, broken water is picked out in white.
South East Asia Basing Colour Scheme. For The areas of interest around the Pacific and the South and East China seas I am currently using the following colour schemes for the bases.
Note: I am updating this as I develop the techniques, additional material has been added on aircraft bases and the construction of the infantry movement trays, since the original post was published
- Land
- Black Wash- Citadel Nuln Oil
- Brown Wash - Citadel Agrax Earthshade
- Grass Base - Vallejo, Model Colour 70893, US Dark Green
- Grass Highlight one - Vallejo, Model Colour 70967, Olive Green
- Grass High Light two - Vallejo, Model Colour 70857, Golden Olive
- Foliage Shadow - Citadel Nuln Oil
- Dirt Base - Vallejo, Model Colour 70880, Khaki Grey
- Dirt High light - Vallejo, Model Colour 70976, Buff
- Sea
- Water Dark areas- Vallejo, Model Colour 70852, Black Grey
- Water Light Areas - Vallejo, Model Colour 70808, Blue Green
- Water Surface Wash - Vallejo, Model Colour 70963, Medium Blue
- Broken Water - Vallejo, Model Colour 70951 White
Great work Andy, enjoying following your progress and really useful articles.
ReplyDeleteCheers, Richard P
Thanks, glad you find it useful, hopefully a few more to come
DeleteAre you going to be using Able Archer (Rapid Fire) or another set of rules?
ReplyDeletelooking at Cold War Commander, although Abel Archer would work
Delete