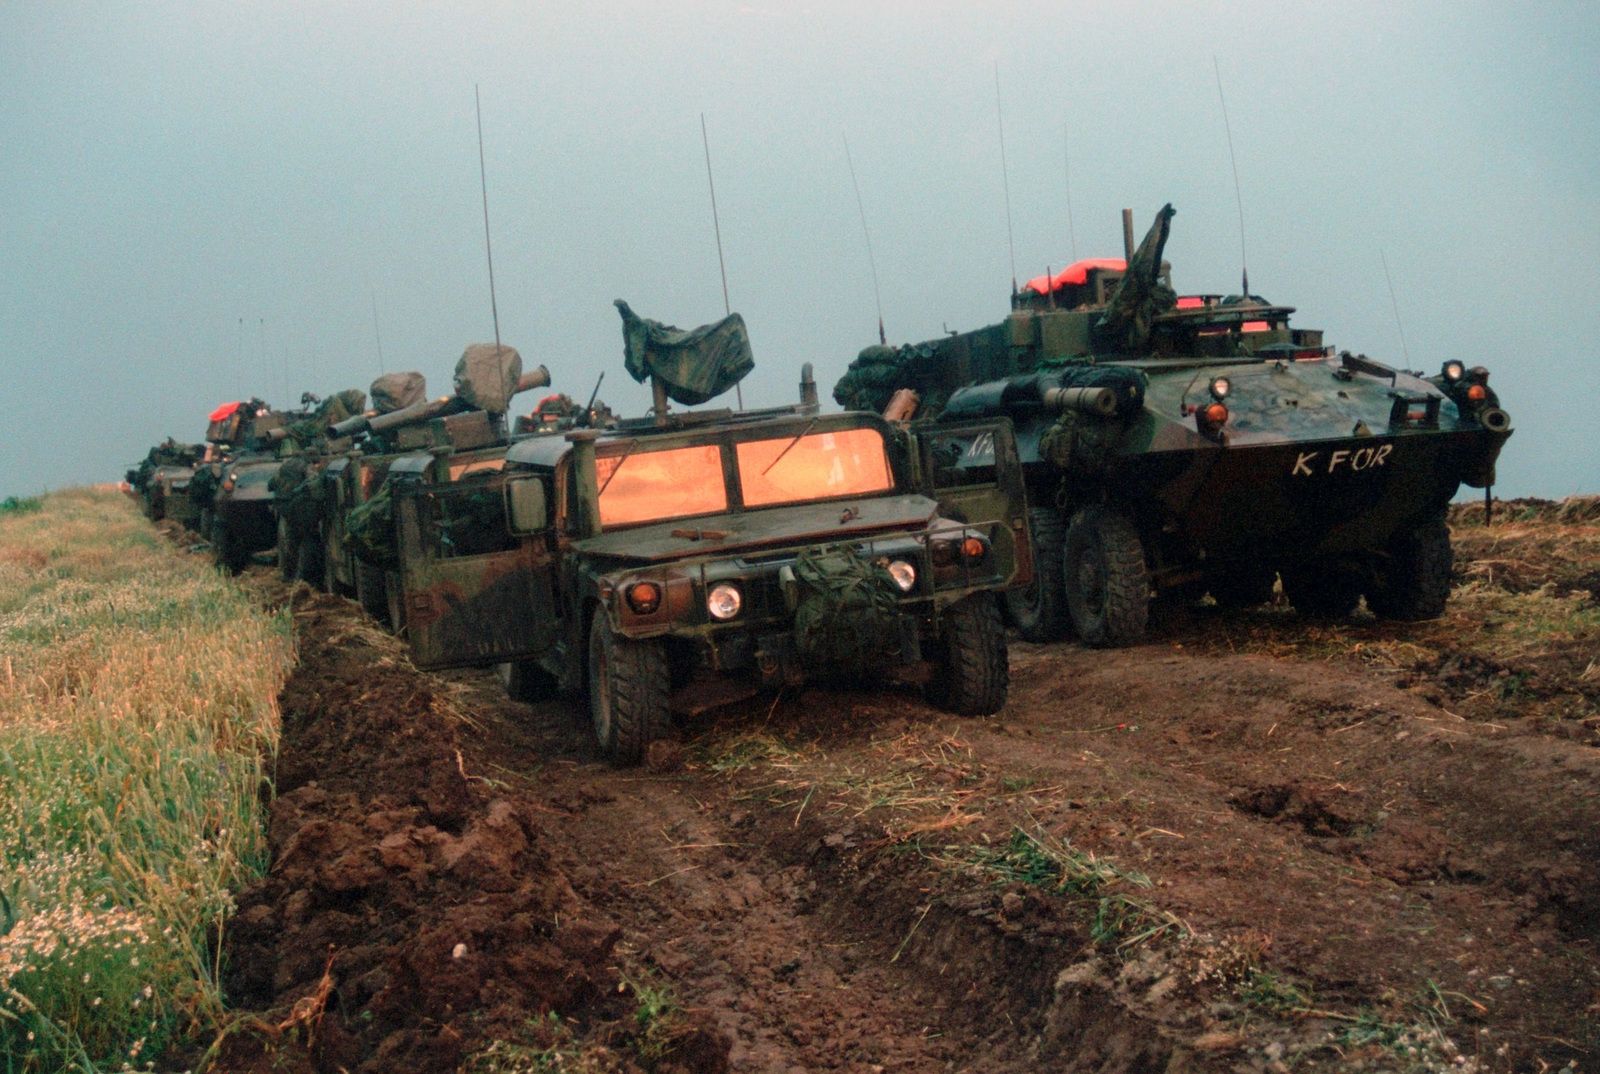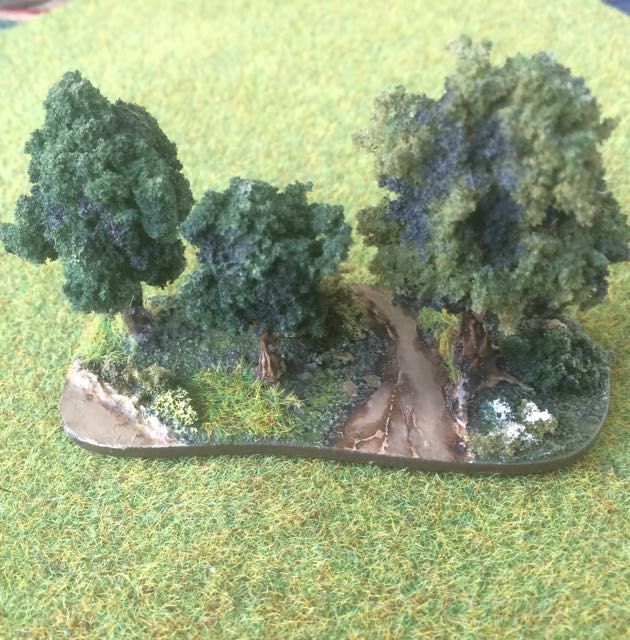
Welcome to Dragon Rising, Bear Resurgent , a blog I am using to record my Post Cold War wargaming projects. These are focused on expeditionary operations by Chinese, Russian, American and NATO forces in the post Cold War era, modelled and gamed in 20mm & 6mm. The blog includes links to various resources useful to the 21st Centuary Cold War Gamer.
Showing posts with label 6mm. Show all posts

Saturday, 31 August 2019

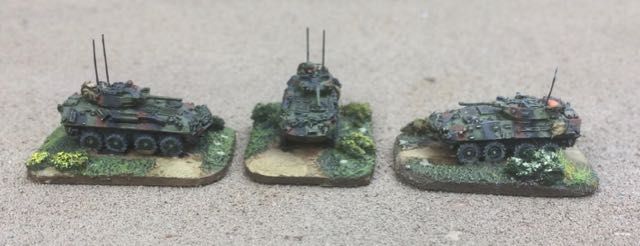
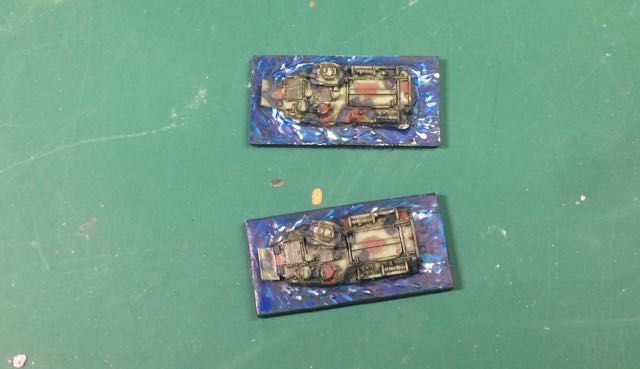
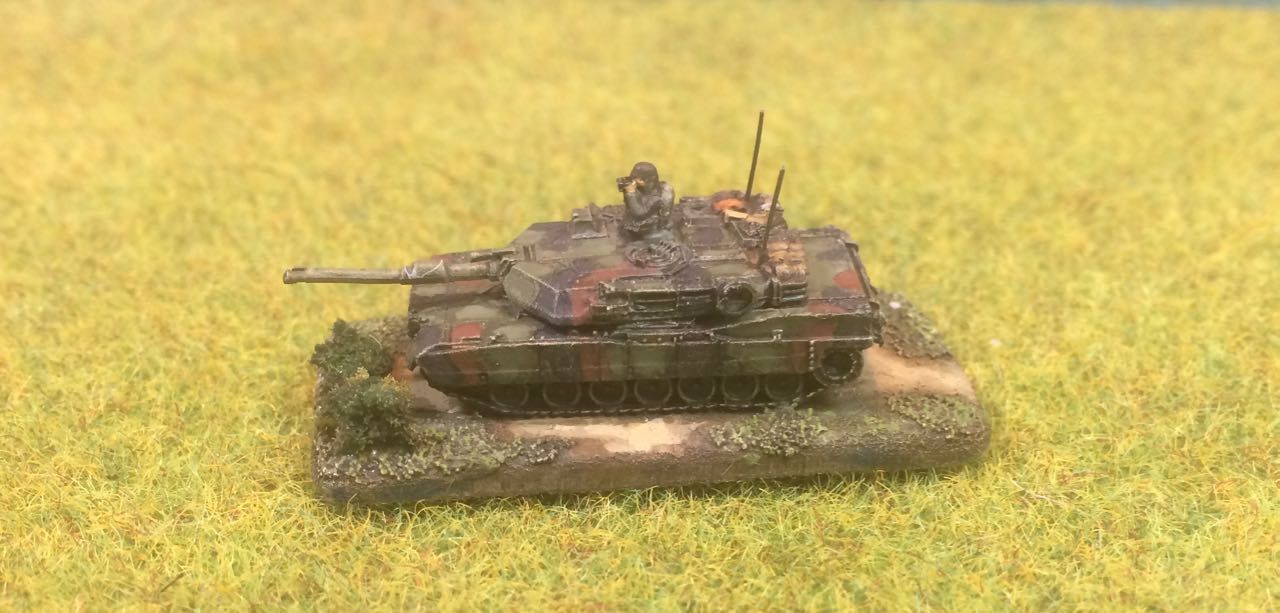
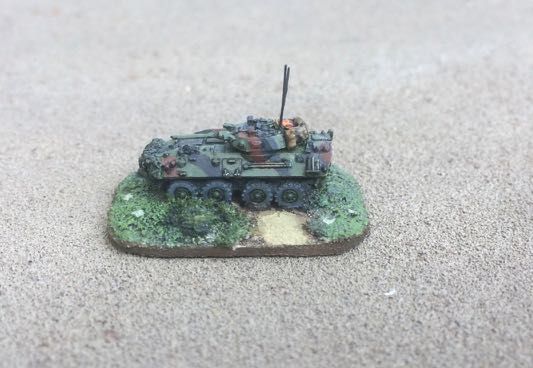
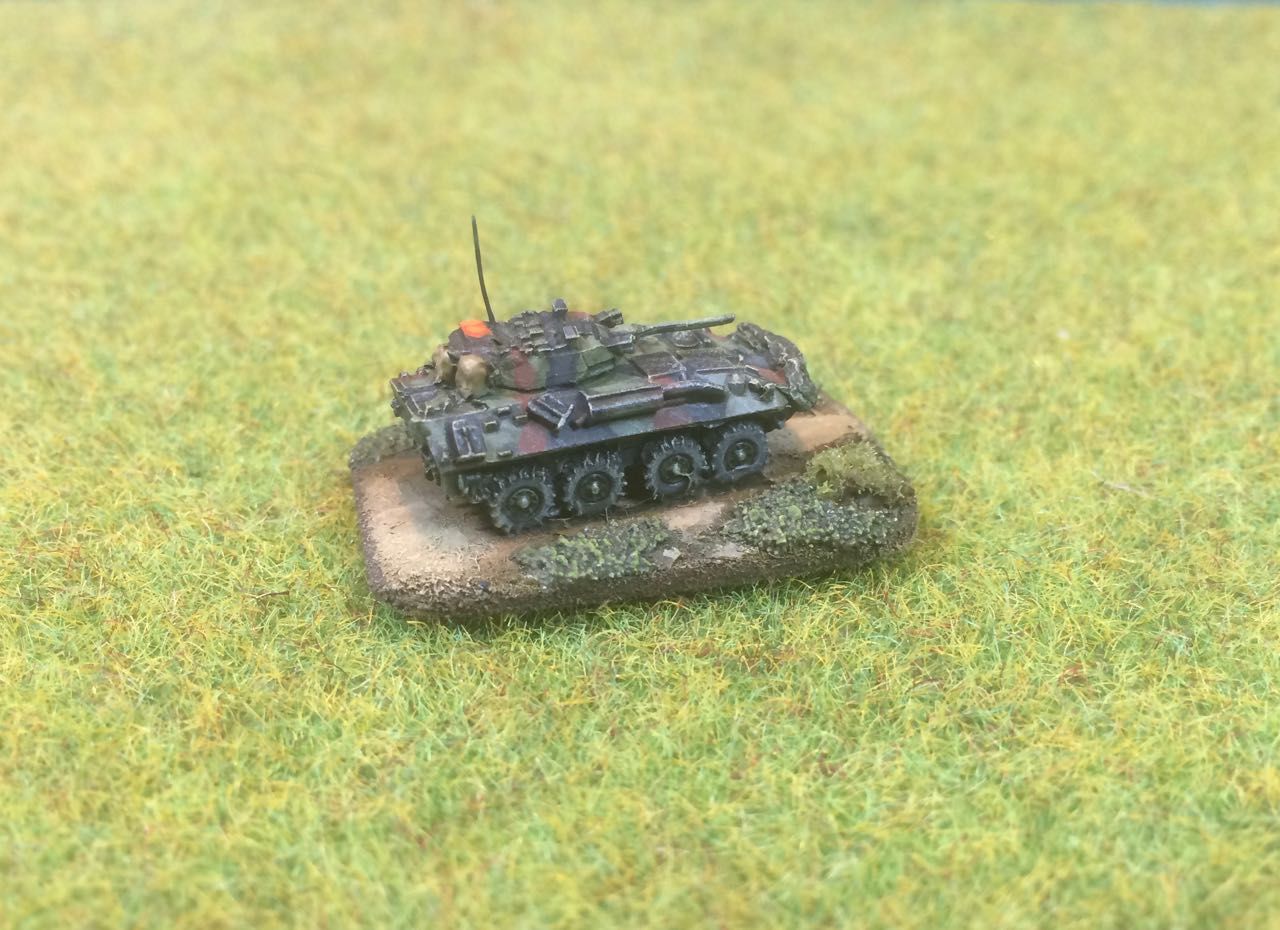
Review Models - 1/285 GHQ, USMC M1 and LAV - 25


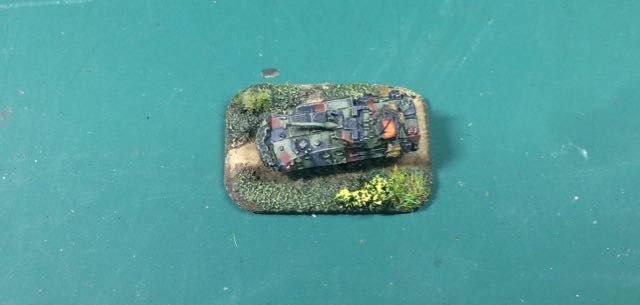
This post reviews the GHQ M1 and LAV 25, covering the general quality of the model, build issues, painting, stowage, markings and basing. Given the small size and the lack of kit building I thought I would do model reviews and builds either in groups or with conversion projects. This is the first group, I am building and painting these for inclusion into an ultra modern USMC force for games set in the present and near future focused on the Pacific Theatre.

The vehicles were ordered from Magister Millenium in the UK and were well packaged and arrived promptly.  The M1 and LAV 25 provide the mainstay of the mechanised/armoured elements of the Ground Combat Component of the Marine Expeditionary unit (MEU), which is the first of the US expeditionary warfare units I am building in 6mm.  


Vehicle Overviews

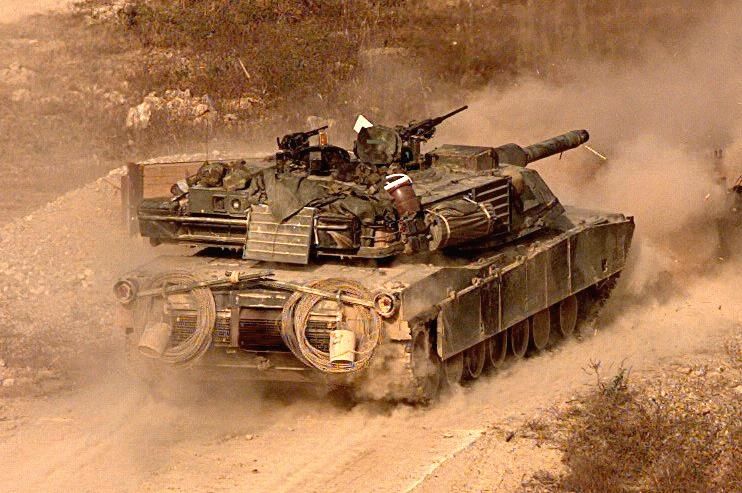
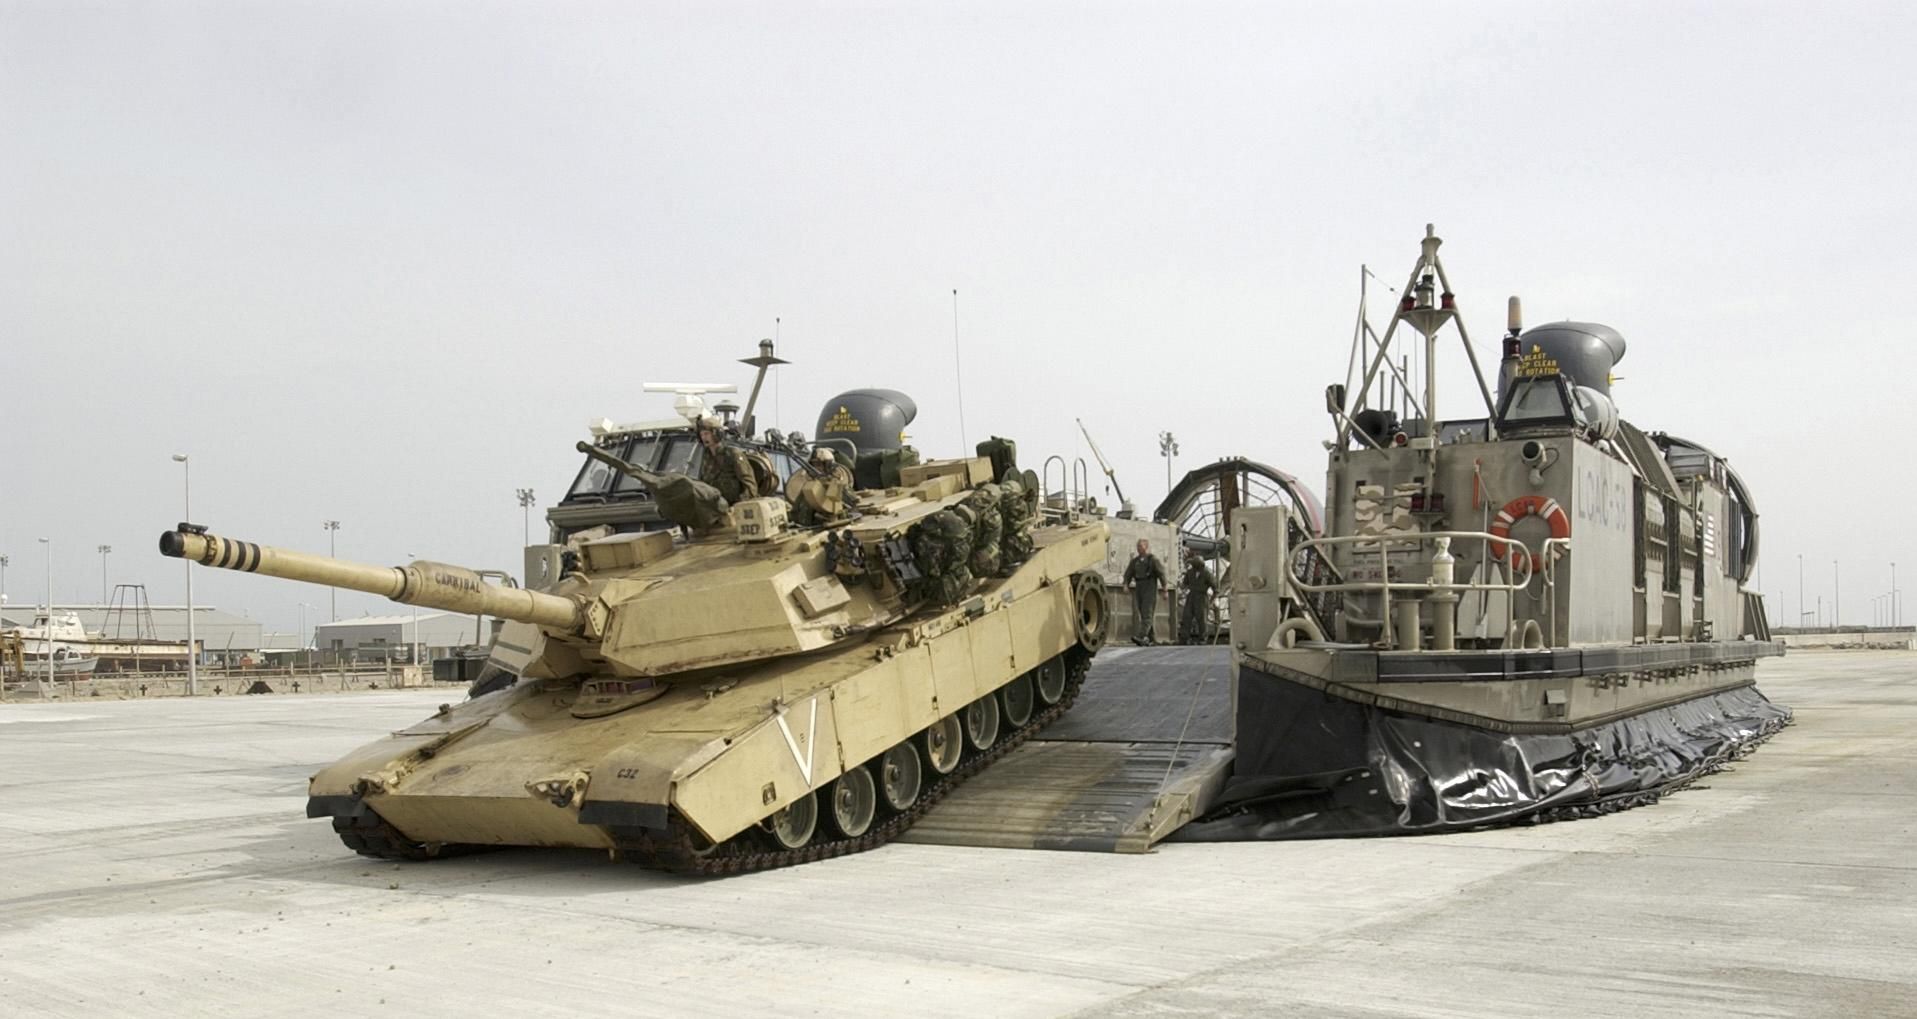
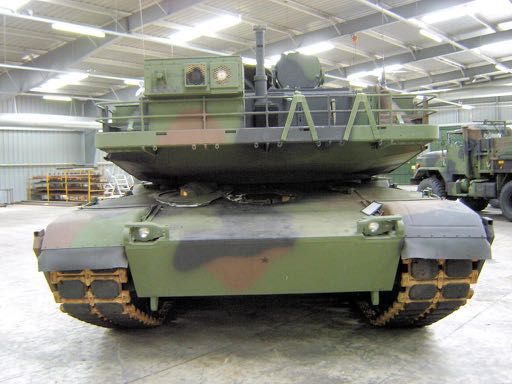
M1 The M1 entered Service in 1980 as a replacement for the US Army's M60A3, the M60 however soldiered on for some time with both the reserve forces and the USMC. The USMC retiring their M60A1s after Gulf War 1 in 1991 and the US Army reserve letting theirs go in 1997.  The M1 was upgraded to the M1A1 with the 105mm gun being replaced by a 120mm gun in 1986. Whilst the US Army is now running with the M1A2C moving to the M1A2D the Marines still have the M1A1. The Marine M1A1 has a number of differences from the Army vehicles to make it fit for operations near the sea. These include different Smoke Grenade Discharger Units and a deep wading kit - handy for getting off landing craft.

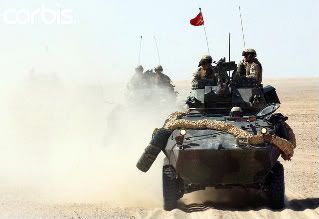
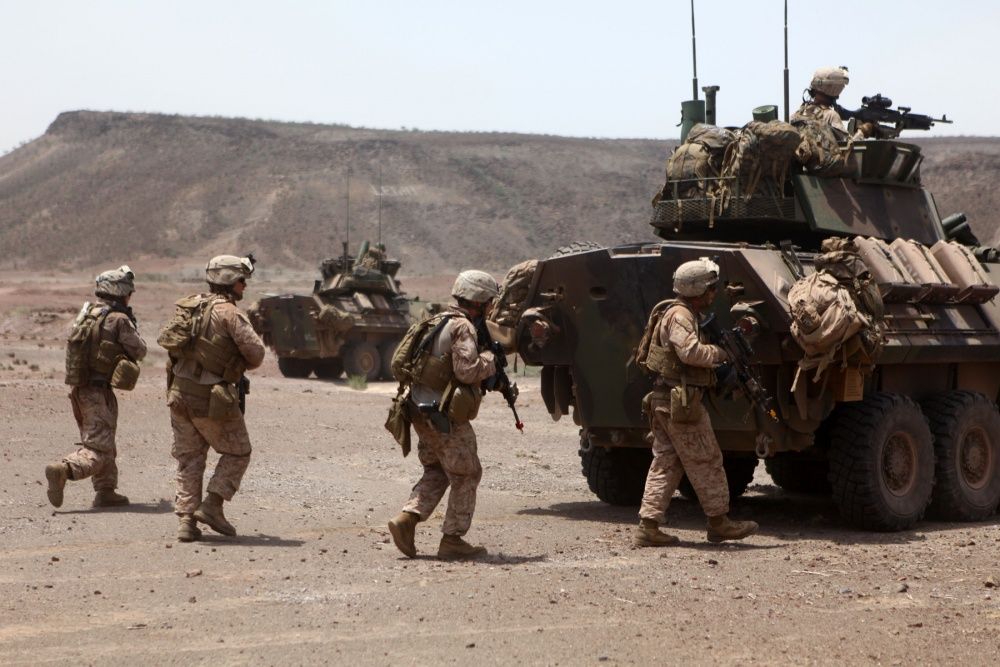
LAV 25 The LAV 25 serves with the Light Armoured Reconnaissance Battalions of the USMC, the vehicle entered service with the Marines in 1983. The LAV 25 A2 currently in service introduced a number of protection enhancements along with TI systems. Whilst the Marines have plans to introduce further upgrades through the LAV 25 A3 they have also just started looking for a replacement vehicle. As well as the base variant a variety of other versions of the vehicle are also in service with the Marines including: Command, Recovery, Logistic, Anti Tank, Mortar and EW.


Models

As you might expect from GHQ the vehicles are all precision moulded in white metal, cleanly cast and packed with fine detail.  Without exception all the vehicles purchased were excellent castings all with separate turrets and moulded barrels.
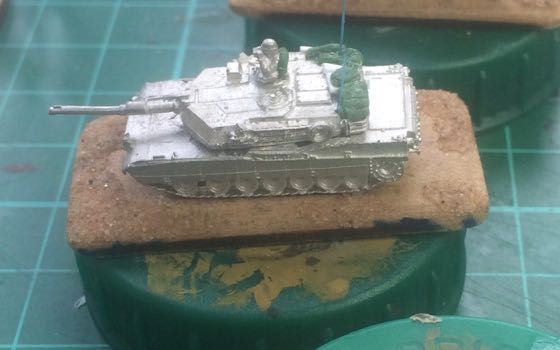


The M1s are supplied with two turret mounted MGs each which because of the fine nature of the casting and small size struggle to survive contact with the postal system despite the extensive packaging and looked challenging to straighten out and then fit.  The models themselves required minimal cleaning and little attention to barrel straightening. Close inspection for small amounts of flash is worthwhile as is identification of the mold injection points which nearly always carry small strings of metal from the casting process and are really annoying to discover during painting. 
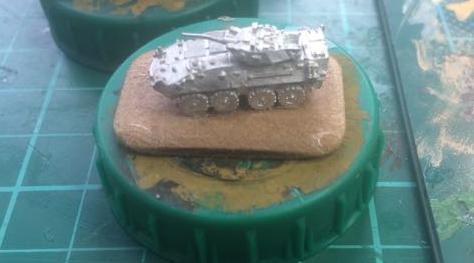


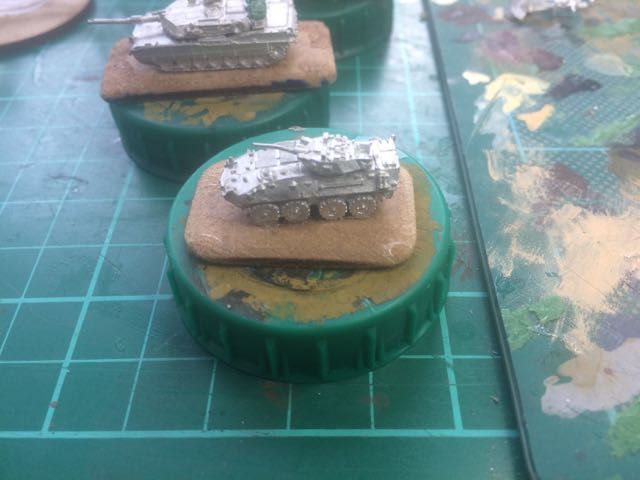
In all cases I have glued the turrets in place keeping the barrels within the footprint of the hull and or hull and base depending on length, in order to reduce the risk of barrel bend during use. The Vehicles have then been mounted on MDF bases with the edges beveled to reduce their height as described in the post on my baseing philosophy.

Stowage and Markings

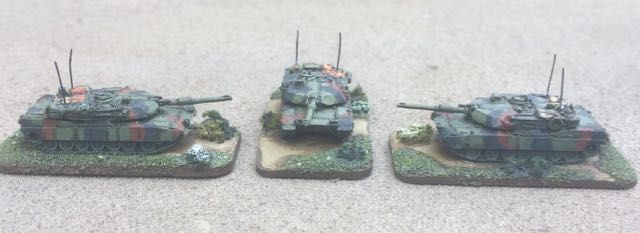
Siowage has always been part of what I love about the USMC and in fact the US Army, they have a remarkable affinity for strapping stuff all over the outside of their wagons. Offering the opportunity to create some quite unique models for the gaming table
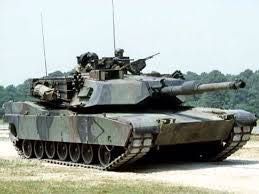
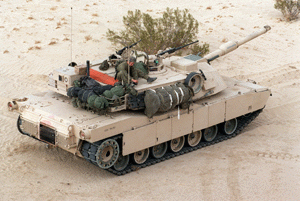

As can be seen from the M1A1 pictures in the post this can cover a wide variety of equipment ranging from personal equipment to spare road wheels, shelters, defence stores lubricants and the ubiquitous air marker panels which can manifest in a number of different sizes and shapes
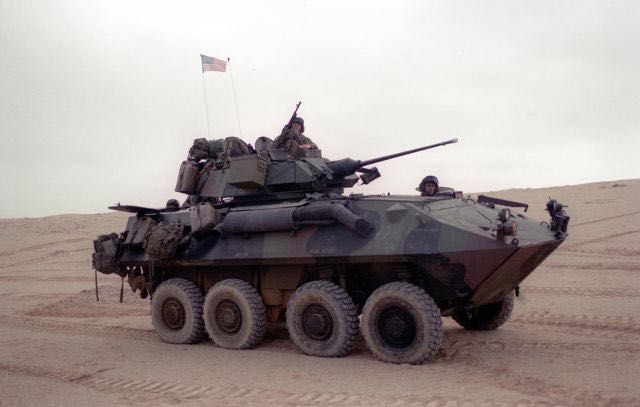
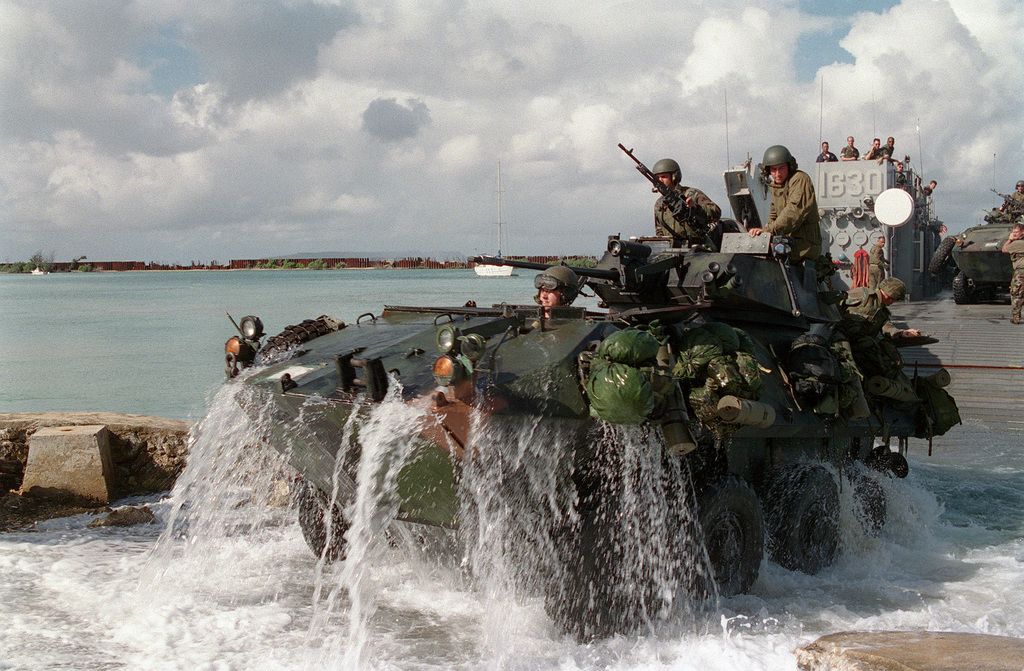
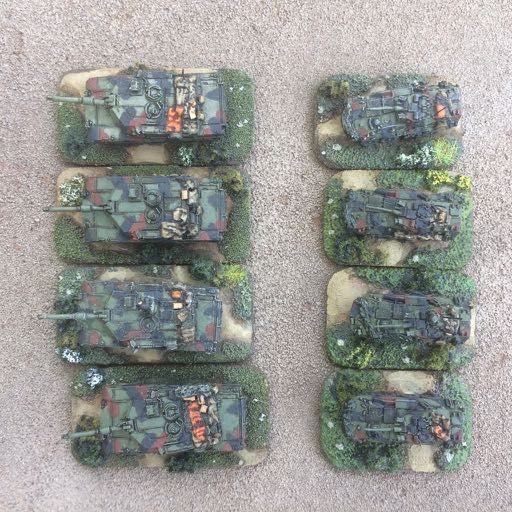
I always think the LAV 25 Crews take the whole stowage thing to a new level, primarily I suspect because of their size and the fact that they carry dismounts in addition to the vehicle crew.  Again a review of a range of images of vehicles on exercises and operations will give you an idea of what might be carried and where it is stowed. To the general list of external stowage can be added spare wheels cam nets and fuel cans which these vehicles always seem to be littered with.

Availability of stowage in this scale is a bit of a challenge although a number of companies offer scale accessories including Heroics and Ross and Perfect Six.  If you want to have a bash at making them yourself my post on Modelling - Stowing USMC Vehicles in 6mm provides a range of approaches to simply representing a wide range stowage items.


As a matter of course Marine vehicles do not seem to carry any tactical markings in the form of Identifying numbers or Symbols. A variety were apparent in the Gulf Wars other than chevrons most of the images I have seen these looked like they had been locally applied to no apparent regulation. I have therefore not applied any to my vehicles.
NATO/Israeli chevrons in white and black can be obtained from a number of sources. Magistere Milenium stock them in Black however the lack of contrast between the chevrons and the vehicle colour dissuade me from applying any. 


Painting

I have altered my painting style to accommodate the challenges of 6mm. It all Kicks off undercoating the model in white a change after many years undercoating 20mm in black. In this small scale the model and colours all benefit significantly from a white undercoat. I don't tend to dry brush on the vehicle at the end of the process as I find the effect on top of camouflaged vehicles makes the model look very busy in this scale. All Paints used unless otherwise stated are Vallejo Model Colour

Base Vehicle and Camouflage
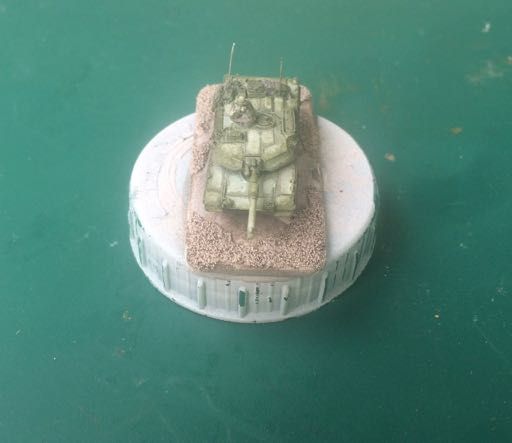
  • 70890 Reflective Green base colour
  • 70846 Mahogany Sand
  • 70860 Black Grey
  • Citadel Nuln Oil Black Wash
A number of dilute coats of the base colour are applied and at least 1 black wash. I then continue to build up the base colour but aim to avoid it becoming too dark allowing the white undercoat and the translucent coats of paint to keep the model a light shade of the base colour. Over shooting this goal leads to highlighting with a mix of the base colour and buff on to the upper surfaces.


Keeping the base colour light enables the model detail to stand out, although I have discovered a number of challenges with this method.
  • Ensuring good coverage of the model to block out the white undercoat needs to be worked at. if I am not looking at the model through a magnifying lens this won't be achieved
  • Applying dilute coats of paint can cause the paint to separate and results in some unusual colours. To avoid this mix the paint immediately before applying and don't let the paint pool on the model, which basically comes down to controlling the amount of paint on the brush.


Once the base colour is sorted I then work on the camouflage pattern. For any particular vehicle I try to keep this consistent which saves thinking too much about the pattern for all the other vehicles  of the same type that you are going to paint and is generally in line with what military organisations do with one or two exceptions.  Researching the pattern can be a challenge particularly for shots of the top of the vehicle, larger scale models and their painting plans can be useful here.
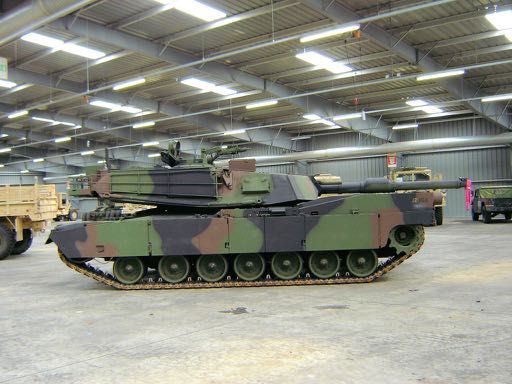
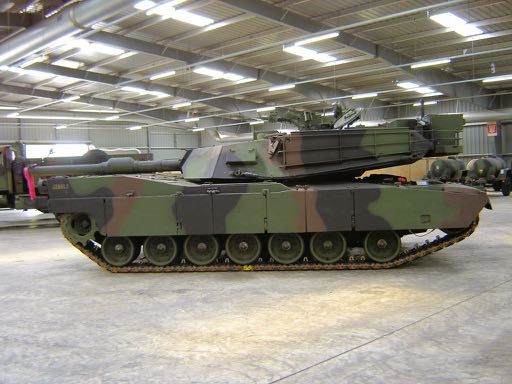


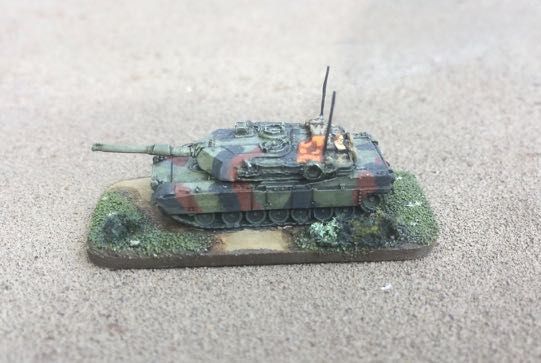
The Camouflage pattern is then applied in line with the reference imagery using a thicker consistency than the base coat in order to gain a level of coverage.  I then generally pin wash before proceeding with undercoating and painting the stowage items and the vehicle detail. The Pin wash is applied direct to the areas of detail rather than all over the vehicle, this can be quite effective if brown is used rather than black.
Stowage Colours
  • 70887 Olive Drab undercoat for brown items
  • 70880 Khaki Grey Packs, highlights + 70976 Buff
  • 70988 Khaki, Tarpaulins, highlights + 70976 Buff
  • 70976 Buff, Ration Boxes
  • Dark Green undercoat for green items
  • 70890 Reflective green, Ammo Boxes, highlights + 70976 Buff
  • 70909 Vermillion for Marker Panels, Highlight 70911 Light Orange
I generally try to limit the number of colours I am working with which saves time and prevents the model becoming too Chaotic.  I undercoat most of the stowage in Olive Drab. This is then overpainted in the relevant colours allowing the undercoat to show through between items or to provide an illustration of folds or the boundary between the top of a pack and the body of a pack.  Items are then highlighted with the addition of Buff to the body colour so for Packs Khaki Grey and Tarpaulins Khaki.  Generally I am looking for high contrast between the vehicle and the stowage item. Air Marker Panels are painted with dabs of crimsen followed by dabs of orange allowing the olive drab and crimson to show through to mark folds.


Vehicle Detail
  • 70860 Black Grey Tracks, Tyres, Weapons and Antena
  • 70860 Black Grey + 70989 Sky Grey Tyre Walls
  • Citadel Agryx Earthshade, wheel wash
  • 70989 Sky Grey Head Lights,
  • 70911 Light Orange Indicators
  • 70909 Vermillion Brake Lights 


Weapons and Tracks are simply painted Black Grey and Tyers are painted black grey and then the tyre walls are painted in a lighter grey using a mix of sky grey and black grey, wheels are usually finished off with a Wash of Agryx Earth Shade. Finally I pick out the light clusters in light grey overpainting with Orange and Crimson where appropriate.

And their you have it. Not the quickest way to get the vehicles on the table but they look quite good when they get their, the quality of the GHQ models is excellent and I think worth the money.


Related Posts:

Modelling - A Baseing Philosophy for 6mm Figures and Vehicles
Modelling - Stowing USMC Vehicles in 6mm

References:

FAS.org M1 Abrams Main Battle Tank
FAS.org LAV and Variants


Friday, 16 August 2019

ORBAT - USMC Marine Rifle Battalion


This post is part of a series that will examine the constituent components of a Marine Expeditionary Unit how they might evolve in the near future and their representation on the wargames table.  The capabilities and organisation of each will be presented in separate posts and the series will conclude with a look at the overall task organisation of the MEU. A MEU is a Marine Air Ground Task Force, the concepts associated with which are covered here.
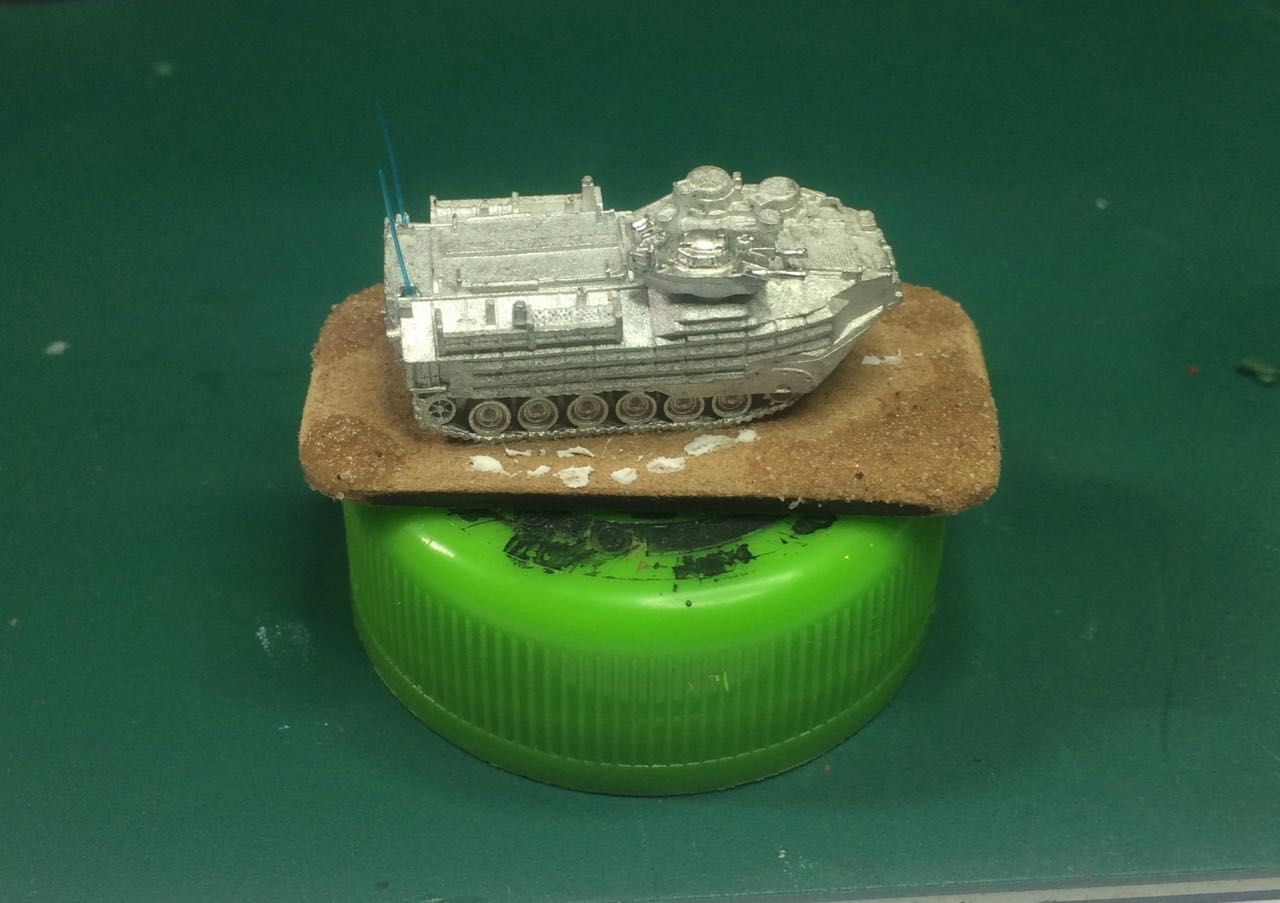
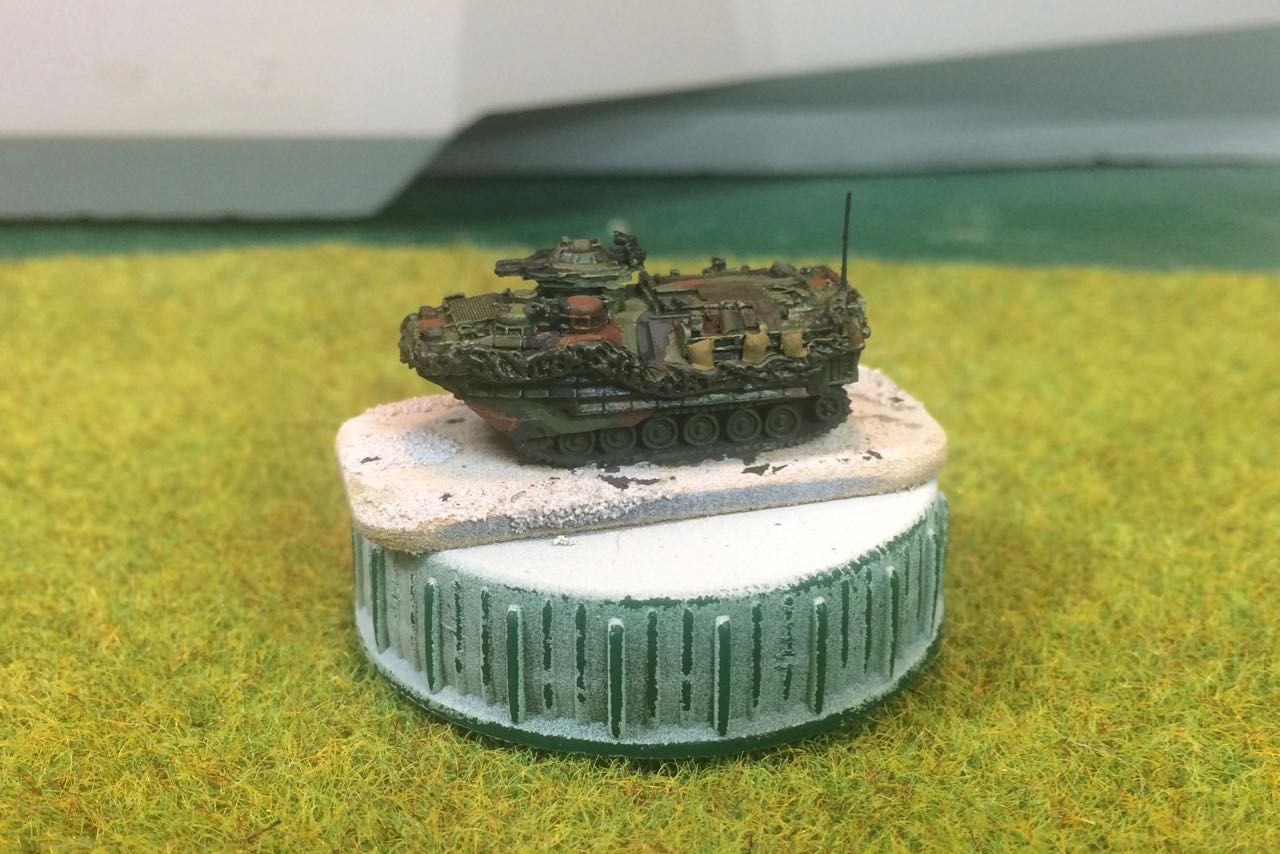
The Marine Rifle Battalion forms the core of a Battalion Landing Team which is the Ground Component of a Marine Expeditionary Unit. The Battalion is also a key building block of the Ground Component in a Marine Expeditionary Brigade. As such it is probably an excellent place to start exploring the capabilities of a MEU in detail.


 The Organisation of the unit is covered in a number of USMC publications:
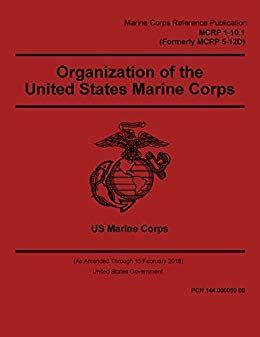
MCRP 1-10.1 contains a High Level outline of the organisation with organisational charts that document the structure to section level but does not include detailed composition. Detailed Composition and Organisational patterns for the task organisation of both the rifle companies and weapons company are contained within MCRP 3-10A.2. I have not managed to find useful detail on the H&S company although there is broad information available on the web on the Scout/Sniper platoon. Whilst MCTP 3-10A covers the Infantry Battalion it is significantly out of date and does not appear to be maintained as is MCRP 3-10A.4 the Marine rifle squad.


All USMC Publications can be downloaded for free from the USMCs own website from the Publications Electronic Library which is worth a browse.

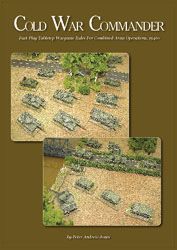
I am currently building my forces for present day to near future operations with a focus on the Pacific. I  use  the  Cold War Commander rule set with 6mm figures and vehicles.  There is an excellent review of the rules here if you are unfamiliar with them.


These rules can represent units at 1:1 or at a more abstract Platoon level for larger games. I have used  a single base and single vehicle for Infantry and tank platoon. For support weapons I have used a group of 3-4 weapons which is generally a section but in some case needs a bit of interpretation as the USMC uses a number of concepts including, squads, sections and teams to describe these groups.

The fighting elements of the unit are contained within the 3 Rifle Companies and the Weapons Company. In addition there is a Headquaters and Supply Company which has some elements that are worth considering.


Headquaters and Supply Company.  The Wargames components of this organisation that need  representation are:
  • Bn HQ
  • Scout Sniper Platoon. 
  • Medical Platoon
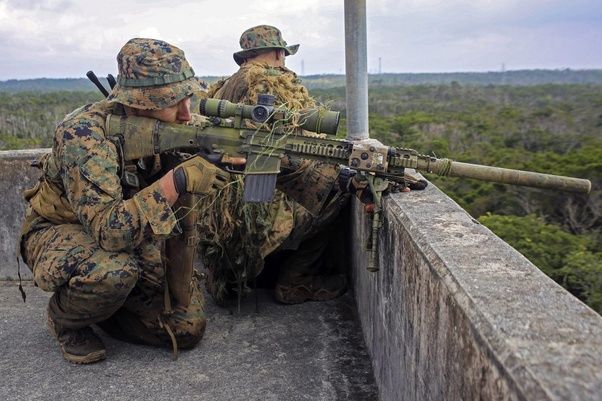
The Bn HQ and the Medical platoon are each represented by a single stand.  The Scout/Sniper Platoon is more of a challenge to tie down organisationally. MCRP 5-12D notes that it exists, MCRP 2-10A.6 Ground Reconnaissance Operations sets out its primary role to provide timely surveillance, tactical data and coordinate supporting arms and close air support whilst providing the Unit with Extended area observation underlining the reconnaissance aspects of the platoon.

A 1999 TOE identifies a small head quarters and 4 4 man scout/sniper teams each capable of deploying 2 Sniper Pairs. The platoon is generally commanded by the assistant intelligence officer and is part of the intelligence section.  A variety of insertion methods can be supported, from Rotary wing aircraft to small boats, or wheels. Vehicles are not organic to the platoon but are provided as needed from Battalion MT or Logistic Units.  The Platoon can be tasked directly by the battalion or task organised with the companies and other elements of the battalion.


In addition to providing a reconnaissance capability they can act as snipers in both the anti material or anti personnel role using any of the in service sniper rifles:
  • M40A5 bolt action rifle being replaced by the Mk 13
  • M107 Barrett anti materiel rifle
  • Mk 13 Mod 7 Sniper Rifle
For game representation I am treating the sniper capability as a support weapon and will use them as two sections of 4 snipers.  I mount Support weapons on two figure bases and I am using two 2 man support weapons bases to represent the platoon and depending on scenario and task organisation will provide them 2 HMMWV for transport.

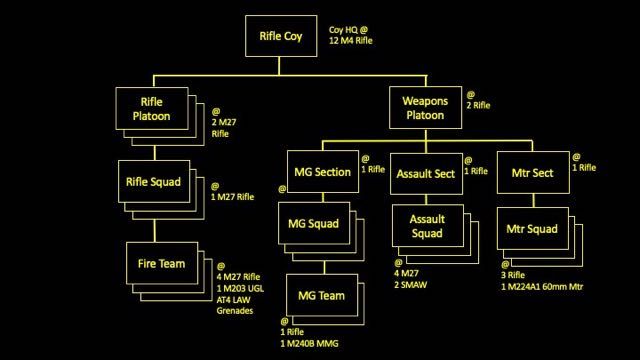
Marine Rifle Companies.  The Battalion has 3 Marine Rifle Companies each  organised as outlined below.


The Marine Rifle Company is essentially a light Infantry organisation. It can be task organised with a variety of transport assets provided by other units to enhance both its protection and mobility these include:
  • AAVP 7 or ACV 1.2 from the Divisions Assault Amphibious Regiments
  • MTVR from  the Transport & Support Companies of Combat Logistic Battalions
  • Small Boats from Navel CORIVRON units, Ship RHIBs or Marine CRRC
  • Rotary Wing inserted by Marine OV-22, CH53 or UH-1Y Venoms


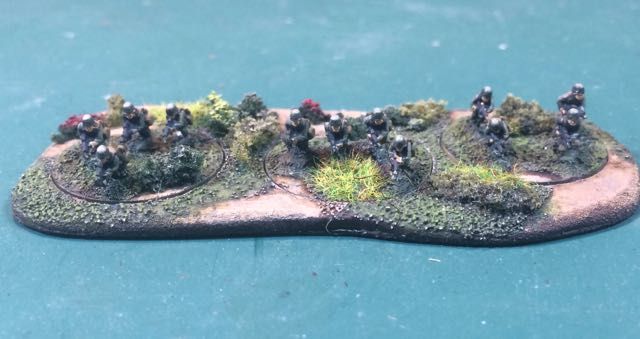
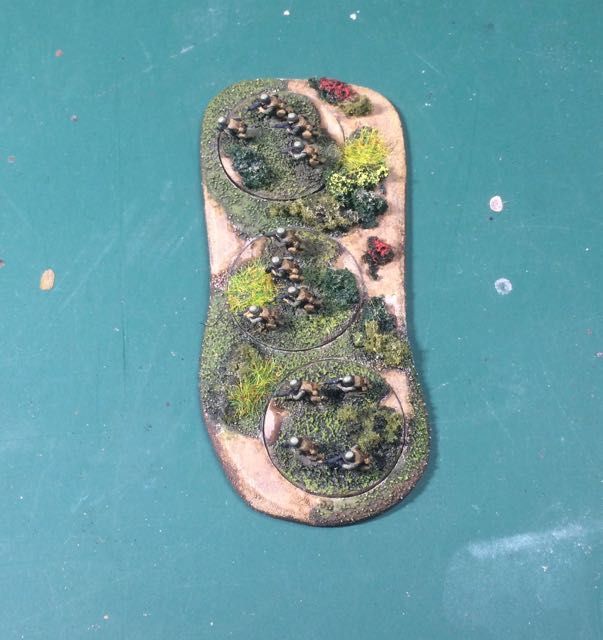
I have represented the rifle platoon using a triple slota base carrying three bases of 4 figures, effectively representing each squad. This offers the flexibility to play at a lower level or use a smaller footprint to represent the platoon in denser terrain such as urban environments where I could reduce to a single 4 man base, and of course they look good. 

The weapons platoon can be task organized to the platoons or grouped centrally  depending on the mission need. I have represented each section with a single base of 2 figures and have them mounted in double slota bases with the company HQ primarily for ease of movement.  A Double slota bases is illustrated below.


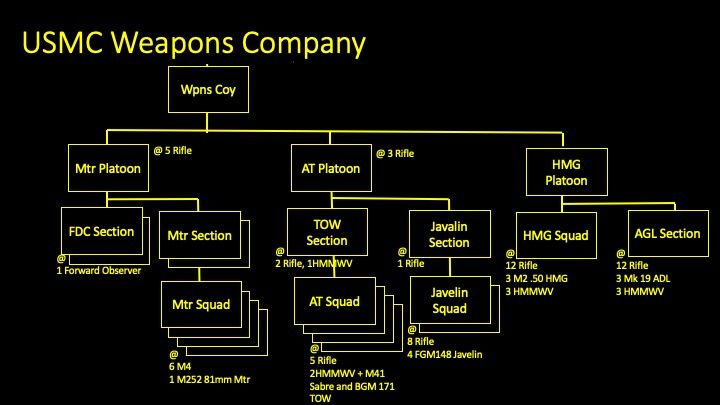
Weapons Company.  The Weapons Company provides an HQ and 3 Support Weapons Platoons, Mortars, Machine Guns and Anti Tank. Some battalions also include the Scout Sniper Platoon within the weapons company.


The USMC have a number of standard patterns for task organising the Weapons Company outlined in MCRP 3-10A.2 these are:

Combined Anti Armour Platoon. This organisation combines the Anti Tank Platoon and The HMG platoon and creates a CAAT Platoon out of the HMG, AGL and TOW Sections.  The Platoon is made up of two Combined Anti Armour Teams. The CAAT organisation is flexible and can be evenly split between anti tank and HMG/AGL sections or biased to one capability or the other creating light and heavy versions of the CAAT Platoon. 


Mobile Assault Company. This task organised group converts a Mortar section into 2 HMMWV mounted maneuver squads each with 3 HMMWV. This can then be combined with an HMG/AGL Section and One or More TOW Squads to form a Mobile Assault Platoon. The Company can then be formed as Two Mobile Assault Platoons and a Fire Support Platoon of the remaining Mortar section.  This formation may be used when the Battalion needs a 4th maneuver company and is also useful for convoy escort.  Whilst vehicle mounted Scout/Sniper platoons are not covered in the Doctrine they would be an interesting addition to this concept.

The Company can also task organise CAAT Teams or AT Squads and HMG/AGL Sections with the rifle companies depending on mission need. The Javelin Squads tend to be task organised with the Companies as a matter of course. 


As can be seen the task organisation of the battalion is highly flexible allowing a wide variety of task organised mission groups to be created from the baseline organisation.

For the Wargames representation of the Weapons company I have stuck with the idea that 4 weapons represent a section as such I have represented the platoons as follows
  •  HMG Platoon with two 2 fig bases and 2 HMMWV, 
  • AT Platoon 
    • Javelin section as two 2 fig bases 
    • TOW section as two TOW Armed HMMWV, I have yet to find a dismounted TOW
  • Mortar Platoon as two 2 fig Mortar Bases and a 2 Figure OP Base and 3 HMMWV. (4 HMMWV if MAPs are created)
At this level both the Mobile assault company and the CAAT Platoon can be represented.


Future Developments:  I have been looking at the future development programs that impact the battalion and will deliver in the near future as I want to game using near future scenarios.  Of these programs it's a case of picking the ones that make an impact at a gaming level the following are of interest:
  • New Company and Squad Organisation, Equipment & Weapons.  The USMC are working through the restructuring of the Rifle Company and the squad this has yet to settle down in terms of numbers but has clear direction in terms of capability for both the company and the squad  and includes:
    • Operations and Intelligence Section in Company HQ
    • Systems Operators for Robotic Systems at Company and Squad Level,
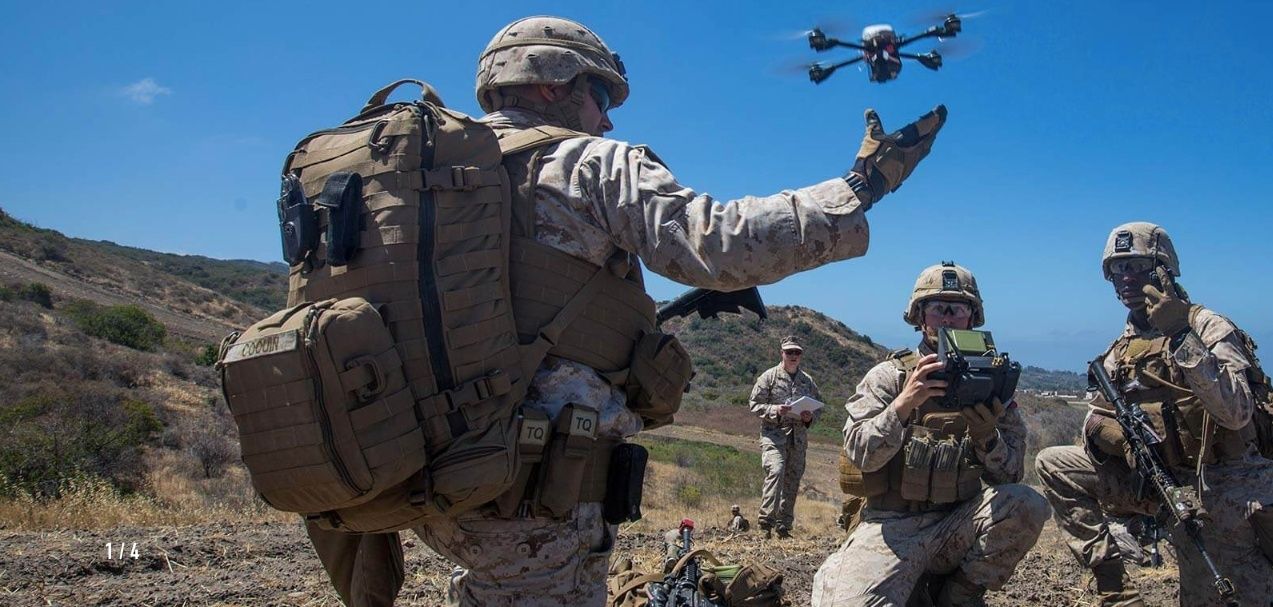
    • New Equipment at Squad level including Quad Copters, Range Finders, Upgraded Night Vision, Ruggedised Tablets
    • New personal equipment Body armour and communications
    • New Weapon Systems, M27 Rifles, M3 MAAWS, UGLs, Designated Marksman Rifle
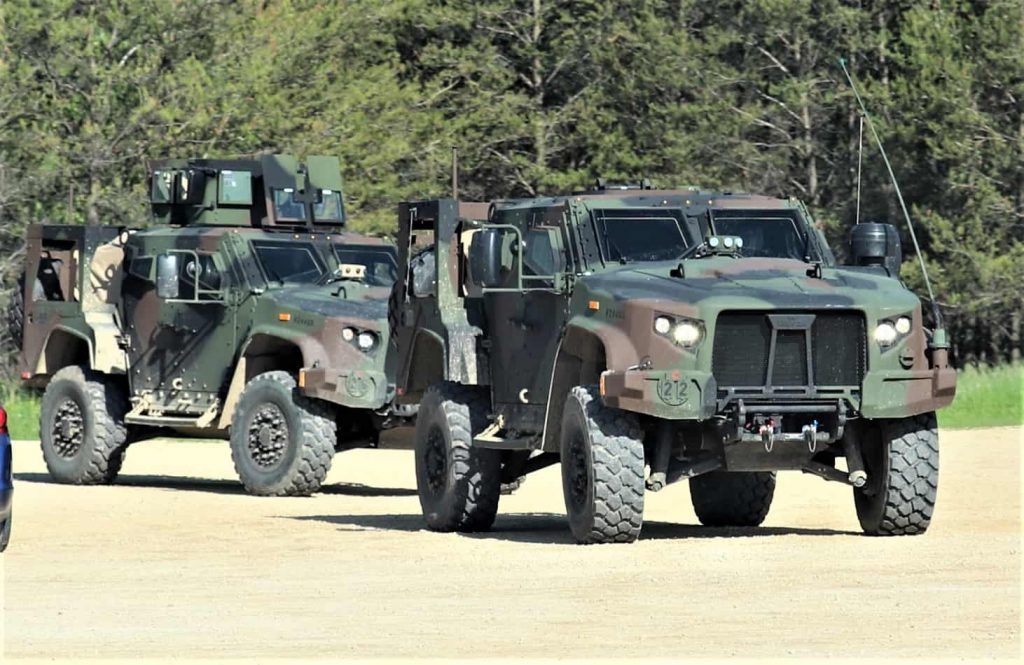
  • J- ATV. The Introduction of J-ATV to replace a proportion of the HMMWV fleet.  The hot question is, which bit? I am playing with a couple of assumptions, the first will be everything in the battalion and the second will be HMG and TOW only.
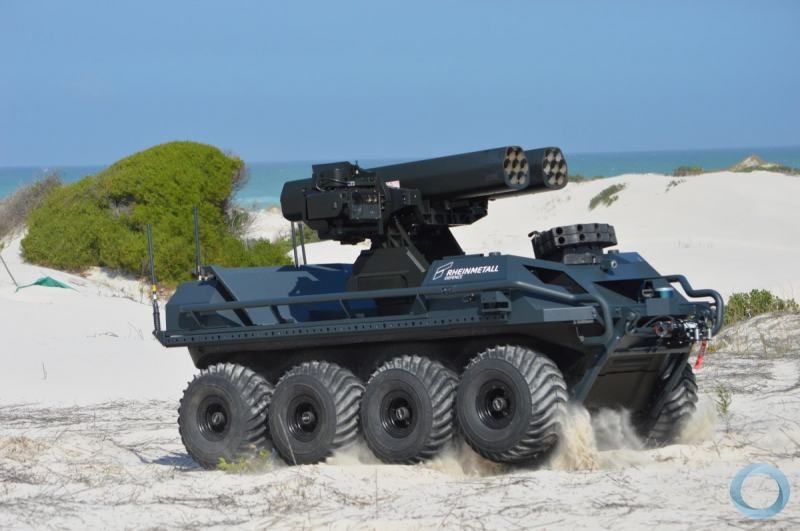
  • Robotics. The restructuring of the Marine Rifle Squad to 15 Men to include a Systems Operator and additional Systems operator roles in the Company HQ point to the increasing importance of  Robotics with UAV, Counter UAV and UGV being considered.  Of these the UGV will be difficult to represent as concepts are immature. UGV roles include heavy weapons, observation, load carriers, and sentries.  The Rheinmetall defence mission master platform below is an interesting example.

  • Anti Armour Restructuring. Phasing out of TOW Sabre and replacement with Javelin. This ones quite easy, the question mark here is how they will employ the Javelin teams mounted with a vehicle mount system or dismounted, I think I will go with the additional teams mounted on J-ATV.
  • More Electronic and Networked Functions moving further forward. an example of this is grouping EW Teams with Sniper teams.  Whilst the article discussed use with Scout/Sniper Platoons it would also work with Force Recon or the Recon Battalion. Game concepts would need to be developed but this typifies the way that different capabilities might be task organised in the future.
  • Representation of Network Centric Capability. Networked Sensors and precision guided munitions have proliferated dramatically in the early part of the 21st Century. The challenge really sits with up-dateing game rules and mechanisms to accommodate the technology.  This is fairly critical for the light weight force who will be relying heavily on the effects this can deliver.

There are a lot more forward looking program efforts and experiments being pursued by the Marines and I will be reviewing more as I examine the other capability areas.


Figures and Vehicles. Everything needed for a USMC battalion is available from the major 6mm manufacturers. I have built this unit from GHQ figures using a mix of their current and cold war infantry packs. The only things that I have yet to find are:
  • Dismounted TOW (not a significant issue) 
  • 60mm Mortar (so my 81mm Mortars and 60mm Mortars all look the same)
  • SMAW figure, I am using a chinese infantry man carrying a PF89 on his back
The bulk of the modelling challenges come with pushing the unit into the near future such as creating UGVs and the specifics of TOW mounts on J-ATVs for example but I have yet to get stuck into that.


References:

Marine, Tom Clancy, 1997
MCRP 5-12D Organisation of the United States Marine Corps, Feb 2018
MCRP 3-10A.2 Infantry Company Operations, Feb 2018

MCRP 3-10A.4 Marine Rifle Squad, Feb 2019
MCRP 3-10A.6 Ground Reconnaissance Operations
MCWP 3-10 MAGTF Ground Operations
MCRP 3-30.1 Raid Operations
Amphibious Ready Group and Marine Expeditionary Unit
22nd Annual Expeditionary Conference
Cold War Commander Rules


Saturday, 29 September 2018

Modelling - A Basing Philosophy for 6mm Figures and Vehicles


Having switched scales I have been re-evaluating my approaches to a number of common modelling tasks that I was generally happy executing in 20mm.  The first covered in my last post, was stowing vehicles,  the second covered in this one is my philosophy for basing.  I had intended to include this with a model review but soon realised that the level of change warranted a more detailed piece of its own, if only to set out an approach for me to follow as the project developed.


I have always been a firm believer in baseing vehicles which;
  • Protects the model when handled.
  • Makes them look good
  • Reduces the effort in moving lots of infantry around the table  
I always think these factors outweigh the negatives which I tend to think of as:
  • The base does not always match the terrain
  • They take up more space for storage 
  • They raise the model up from ground level.
Elements of the negatives are also more easily managed in this scale as the costs of the models are significantly less than in say 20mm, so you could have multiple versions of the same model on different bases for instance, although I think I'd draw the line between a complete set of Urban and Rural based vehicles although I am considering it for the ship to shore elements and some aircraft.


Base Thickness. I like Laser cut MDF bases which are very easy to use, though in this scale there are challenges as the thickness of the bases tends to be around 2mm which is 33% of model height as opposed to 10% of model height in 20mm.  

To counter this I rounded the base corners and then chamfered the edge to reduce the visual impact of the thickness when the model is on the table.  For some of the bigger bases such as infantry group bases an electric sander is a blessing otherwise a sanding block and or sanding sticks are sufficient to the task.

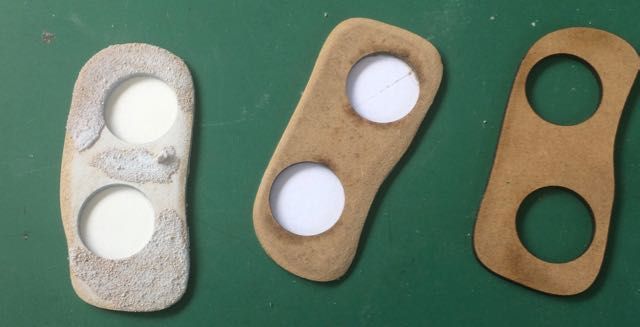
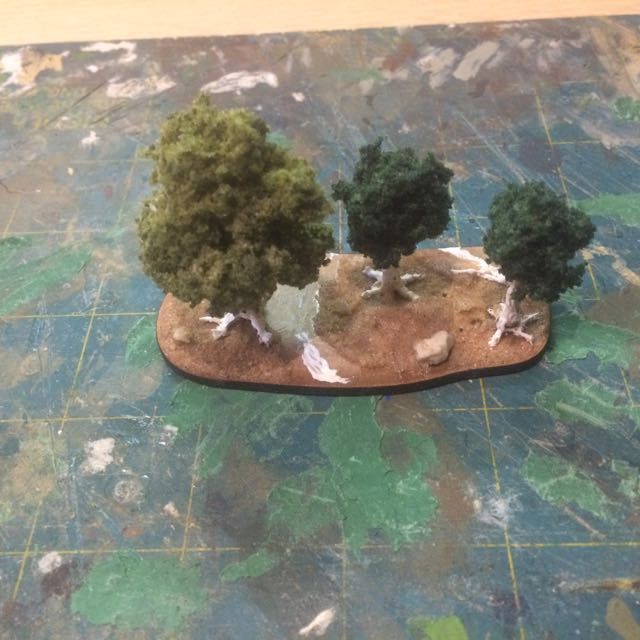
The Infantry movement tray bases are a particular issue as they have a 2mm thick base which has a 2mm thick additional layer with the cutouts in on top.  I replace the bottom layer with cardboard which keeps the height increase to a minimum. Care needs to be taken when working the these bases to keep glue and baseing material away from the slots and the edges of the infantry bases.  The irregular shaped base elements left over by this approach are used for small groups of trees and scatter terrain.


Base Sizes. I think the models look better when you use consistent base sizes for different vehicle types even if the rules don't require it.  Currently for my 6mm forces I am using or considering using the following:
  • Large Armoured Vehicles, 40mm x 20mm
  • Small Armoured Vehicles, 30mm x 20mm or 35mm x 20mm
  • Large Soft Skins, 35mm x 15mm (yet to use this so may need revising)
  • Small Soft skins, 25mm x 15mm 
  • Aircraft Bases 40mm Diameter
  • Artillery Bases, 40mm Diameter
  • Infantry teams, 20mm Diameter
  • Infantry Group Bases, Irregular 2 and 3 team pill bases approx 40mm x 80mm


I get all my bases from East Riding Miniatures who are very quick and have a great range of sizes and in this scale that probably covers significant terrain components.  In addition they produce to a consistent quality.

Ground Work This of course is an area of personal taste but having modeled in 20mm for so long I thought the groundwork raised further challenges as the materials I had used in 20mm seemed like they would be disproportionate in size for 6mm.  Examples include:
  • Static grass which is between 1mm and 2mm in length which in 6mm represent effectively very long grass rather than short grass
  • Sand particles which I use as texture for dirt surfaces in 20mm seemed to be similarly outsized. 
 I therefore decided to revise what materials I used and have outlined my thoughts below.


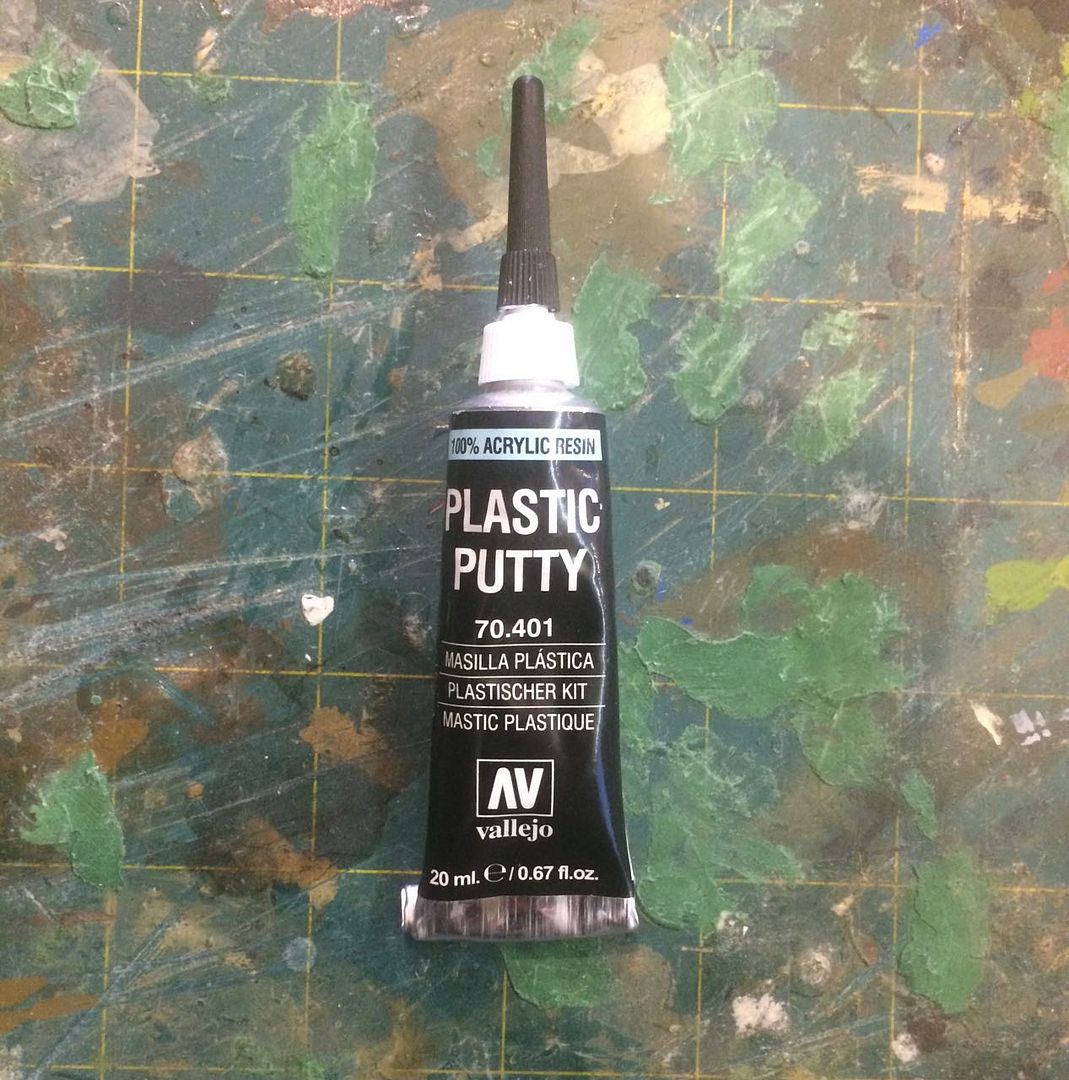
  • Dirt Surfaces, Instead of applying sand I just abraid the surface of the mdf base with sand paper to rough it up a bit and add small amounts of fine texture using my new universal best friend, vallejo plastic filler pipped on to the surface. Plastic filler can also be used to blend in the edges of infantry bases if they are on dirt rather than grass. Because of the long applicator nose this is easy to accurately apply.
  • Short Grass, Instead of static grass I am using fine sand particles applied on top of white glue. These can also be built up in layers to provide surface variation, I seal it with white glue once the effect has been created otherwise it eats paint.
  • Long Grass. Small clumps of static grass, short tufts (2mm) and Turf clumps any or all attached with white glue.

  • Shrubs and bushes, I use clump bush material divided into a variety of sizes; 1mm-  2mm for small shrubs and long grass and 6mm - 12mm for large bushes and hedges. I use a contact adhesive to attach it to the base, and then saturate it with white glue so it becomes hard. When the white glue has dried and the bush hardened  I then enhance shadow areas with dark green and highlight upper surfaces with buff or light green . These can also be dry brushed with bright primary colours to represent flowers.

  • Rocks.  I use a variety of material to represent rocks rough sizes are: fine ballest 1-2mm, fish tank gravel 2mm-3mm and garden gravel 4mm - 10m.  These are attached using a contact adhesive and painted, washed and dry brushed, with the ground around their base receiving a dark wash to represent shadow.
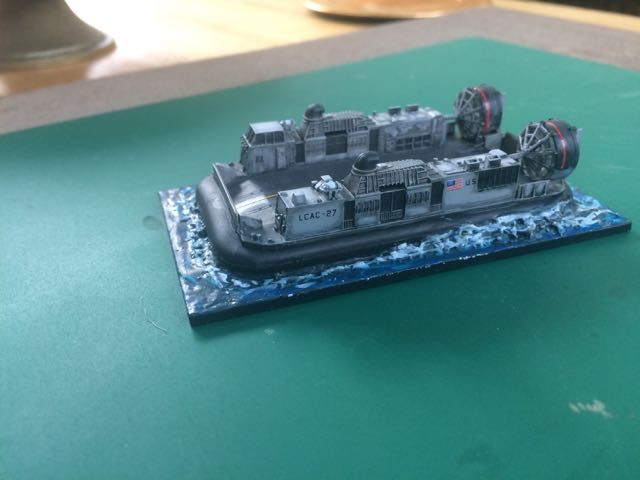
  • Sea and River bases. For representing broken water and surface ripples I use the Vallejo plastic filler again which builds up nicely in layers to represent the spray effects at the back of this hovercraft. Once it has dried I give the base a few washes of white glue to provide a smooth surface  before painting.
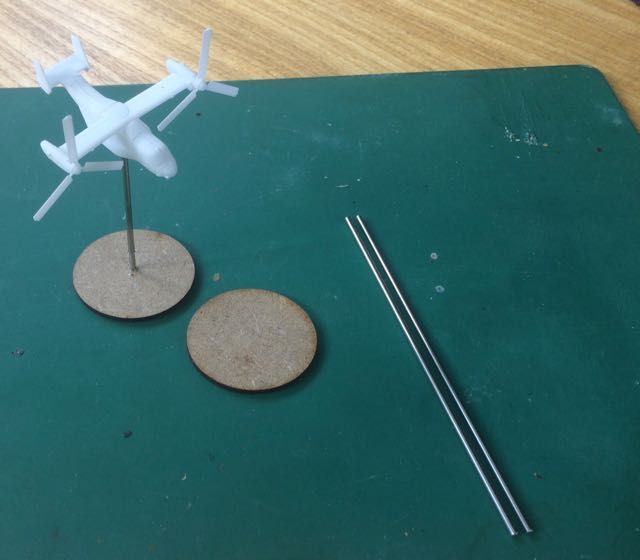
  • Air Bases.  For aircraft I originally kicked off with the idea of using Coresec bases which are very good but a bit big for 1/350 aircraft which is what I am currently intending to use for the aircraft scale.  Wire always strikes me as having potential for getting bent over time, even in reasonably heavy gauges. So I have gone for 2mm stainless steel rods, very strong and a challenge to cut, they need a vice, a pair of bolt cutters and a spare hand but do look very good. I have mounted these in 40mm diameter round bases using a 2mm drill bit and contact adhesive, then the base is prepared as either a land or sea base depending on aircraft role.


Assembly and Production.  I use the following assembly sequence to put the model and their bases together, which broadly follows the following sequence:
  • Stage 1
    • Modify base, Round corners, chamfer edges sand the surface with sandpaper to roughen dirt areas
    • Attach vehicles/figures
    • Attach based vehicle to painting support (I use plastic bottle lids)
  • Stage 2
    • Apply sand to base to represent grass areas, layer and seal on completion with white glue
    • Stow Vehicles when base dry
    • Prime with white primer
  • Stage 3
    • Paint Vehicles/Figures
    • Paint Dirt and Grass
  • Stage 4
    • Add Scatter Material
    • Paint Scatter material as required

Painting Technique. For 6mm I have been developing a painting style similar in approach to water colour painting.  This uses thin coats of colour on top of white primed bases and models and alternates this with black or dark brown washes using comercial washes. The thin coats of paint are always thin enough to be translucent. Care needs to be taken to not overload the brush.
  • Land Bases I start with a wash of black on grass and brown on the dirt surface, which helps me see. This is then followed by a thin application of the base colour and a follow on black brown wash. Depending on the level of surface texture this is then finished with either dry-brushing or washes of lighter shades of the base colour covering a reducing proportion of the area to be painted leaving the dark edges exposed.  The effect can be enhanced on completion with a final wash around the edge and any raised features on completion.
  • Sea Bases, I start with a pre-shade of black grey applied to selected areas, I then wash with medium blue followed by adding highlights in blue green before another wash of medium blue and a wash of dark grey.  This is repeated until the required effect is achieved, broken water is picked out in white. 


South East Asia Basing Colour Scheme.  For The areas of interest around the Pacific and the South and East China seas I am currently using the following colour schemes for the bases.
  • Land
    • Black Wash- Citadel Nuln Oil
    • Brown Wash - Citadel Agrax Earthshade
    • Grass Base - Vallejo, Model Colour 70893, US Dark Green
    • Grass Highlight one - Vallejo, Model Colour 70967, Olive Green
    • Grass High Light two - Vallejo, Model Colour 70857, Golden Olive
    • Foliage Shadow - Citadel Nuln Oil
    • Dirt Base - Vallejo, Model Colour 70880, Khaki Grey
    • Dirt High light - Vallejo, Model Colour 70976, Buff
  • Sea
    • Water Dark areas- Vallejo, Model Colour 70852, Black Grey
    • Water Light Areas - Vallejo, Model Colour 70808, Blue Green
    • Water Surface Wash - Vallejo, Model Colour 70963, Medium Blue
    • Broken Water - Vallejo, Model Colour 70951 White
If you have any ideas or tips you would like to share please do so in the comments section or on the Coldwargamer facebook page.

Note: I am updating this as I develop the techniques, additional material has been added on aircraft bases and the construction of the infantry movement trays, since the original post was published


Saturday, 22 September 2018

Modelling - Stowing USMC vehicles in 6mm


Vehicles in most armies carry a degree of external stowage and there always seems to be more of it when they are on operations rather than exercises, I suspect because ammunition load outs always take up more space when you are expecting to have to fight. The USMC seem to embrace external stowage to the full and pictures of their vehicles from recent deployments nearly always carry an amount of external load.


Having built one USMC force in 20mm I was used to loading their wagons with all sorts of stowage to match the images seen on the web, in the press and my somewhat vivid imagination.  In the land of 6mm, I was not exactly surprised to find that there were limited product ranges out there for representing external stowage and a lot of the techniques I had used for Cam nets and other items looked like they might be of less use in this scale.


One of the great things about 6mm, of which I am rapidly discovering there are many, is that 1mm represents a foot, so it's relatively easy to work out how big the stuff needs to be to fit on the model even for the mathematically challenged like myself.  The other great thing about 6mm is that very small things can be represented by very simple shapes and still look good, although I am generally of the opinion that you need to keep the objects of a fairly consistent size and shape if they are to be credible. Other than that its largely a question of colouring them in.


What Stowage and How to Make it
The ideas I have had to date are based on what one might consider to be common stowage items and the size they need to be, and how I have currently approached be representing them.

  • Crew - Chopped Figures, prone figures with Binos, turned out to be very good, green stuff hatches added to their backs round them out.


  • Radio Antenna, 2-3m long so 6 - 12mm, I went for tooth brush bristles, which are pretty thin virtually indestructible and don't put holes in your fingers.
  • Boxes - Various shapes and sizes from 10-12 inches for ammo cans through to 3-4 feet for ration cartons and large calibre ammunition crates, I went for plastic strip in a variety of thickness and widths, cut to an appropriate length enabling me to easily create multiple consistent boxes.
  • Rucksacks, I started with green stuff but in order to get a consistent size and shape switched to plasticard 3mm wide x .25mm thick (ish) which I cut in to 2mm strips then bulked out with Vallejo plastic putty, which is great for all sorts of bits in this scale, if you want something pipe it.

  • Roll Matts, .5mm plastic rod or brass rod cut to 2mm-3mm length, plastic rods better as you get square ends.

  • Grease Cans 1mm - 1.5mm plastic rod cut to 2 - 2.5mm lengths
  • Rubbish Sacks, piped with vallejo plastic putty
  • Sleeping Bags, green stuff or Vallejo plastic putty
  • Tarpaulins, green stuff
  • Cam Nets, green stuff, rolled to the approximate thickness required, then applied to vehicle, trimmed to size, pulled and pushed to make it look like its hanging from ties, then textured using a sharp point and a knife blade, ideally dipped in water to stop the green stuff adhering to the instrument of choice.
  • Air ID Marker Panels, I believe the US ones are modular and can also be folded so anything from a small square to a strip 2mm x 6mm. I use tin foil.

  • Flags - Tin Foil cut to size
  • Crew served and individual weapons - trimmed from figures, yet to really give this a go
  • Wheels - I think Heroics and Ross do some but I have yet to get my hands on any
  • Jerry Cans - I gave up :), any one knows of any let me know.


Where To Stick It

The important thing to bear in mind when stowing any vehicle is that it is a working machine:
  • Bits of it are hot, 
  • Bits of it move, 
  • Hatches, panels and turrets need to be accessible and able to function to allow entry exit and access for maintenance.
  • Air needs to circulate through engine grills to cool engines.  
Most of these places are best avoided and therefore the space on the vehicle to stow things is actually fairly limited.  Having said all that sometimes you have to pack in a hurry so there will always be the odd exception but as a general rule most crews will stow there wagons in a way that does not impair there ability to fight and maintain the vehicle.