
The Type 89 or ZSD 89 entered service in 1990 and is an evolution of the Type 63/85 family. The vehicle is capable of carrying 15 and is armed with a 12.7 mm QJC 88 HMG mounted in an open protected mount. The vehicle is amphibious and provides the basis for a large number of varients covering supporting roles from recovery to observation post vehicles and weapons carriers. In addition the vehicle has been adapted as the basis for a number of Artilery systems. Given its relatively wide deployment and the variety of roles it fills it seemed a worthwhile activity to try and create one through converting the S&S Type 63.


The Type 89 is 3.13m wide 6.125 m long and 2.59m high, whilst the Type 63 is 2.978m wide, 5.476m long and 2.58m high. In 1/72 scale this equates to a difference in width of 2mm and in length of 9mm. Given the difference in length and the overal similarity in shape. I decided to focus the conversion on lengthening the vehicle only.
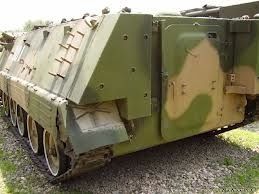

There are plenty of pictures on the web both of the real vehicle and 1/35 model kits both of which provide good sources of information on what things look like and what goes where. In addition vehicle plans, like these from the Hobby Boss 1/35 scale kit allow you to create effectively a scale drawing from which key measurements can be taken although this is less critical on a conversion and more critical on a complete scratch build.

The S&S Models type 63 APC is the basis of this conversion which of itself is a very attractive model of the most numerous of the Chinese APCs. Other than the length and width differences already discussed the remaining features that would need to be changed include:
- the arrangement of the engine decks
- two additional hatches over the extended rear deck.
- external fuel tanks
- an extra road wheel.

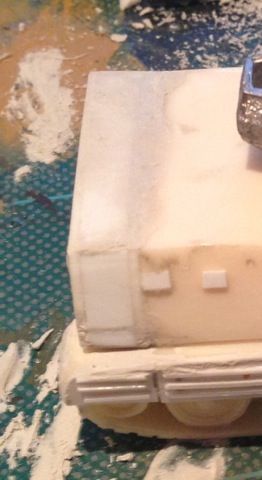
You have two options to extending a vehicle, cut it in half or build on the back, in this case I decided to build on the back. The first job was to remove all the detail no longer required, primarily the rear hatches and back door.

I then built up the extension to the rear using Plasti-card. I am not a great precision cutter so my general approach is to get it broadly right then fill and sand my secret tool in any modelling endeavour is this baby.

With care it can rapidly rectify faults aid in complex shape development and smooth filler rapidly. if your not careful it fills your lungs with dust and wrecks your models so, masks and tidying up are one required activity and another is the taking care when your sanding. The main benifit for me is the speed.
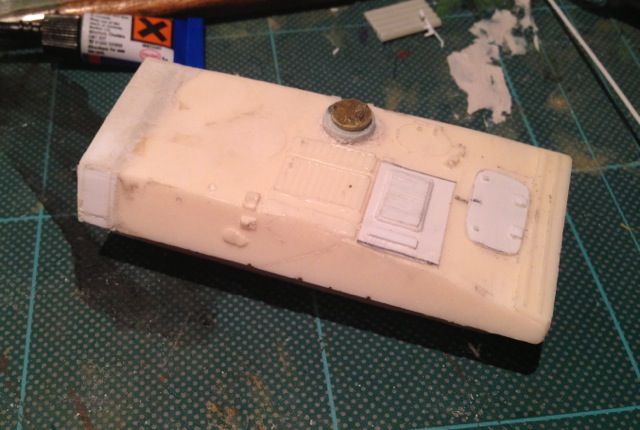
Having sorted the backend, I then built up the engine deck out of card stock before, attacking the roof hatches and seating the turret which comes from another of S&S's kits the ZSL 92A or Wz551 as it appears in their Catelouge. With the forward hatches removed the 25mm Cannon from the ZSL 92 can be used although this varients did not enter service.
I then added the rear door detail, the fuel tanks and hull side detail before attacking the tracks.

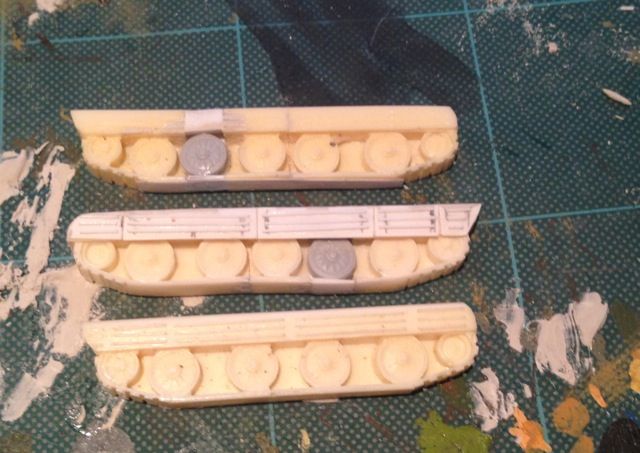
The tracks needed:
- extending,
- a new road wheel inserting
- the road wheel spacing to be representative
- appropriate side skirts to be built up.
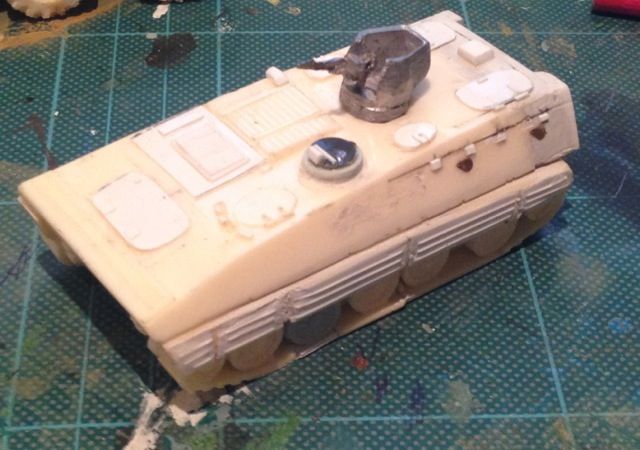
This needed the track cutting in Three places to address the first three items, once cut Plasticard was attached along the track length before the gaps were filled using Plasticard and are friend the filleing and fileing solution, during this stage all surface detail on the existing side skirts was removed.
The side skirts were then built up using Plasticard and filler to create a smooth join with the top of the track guards. The reinforcing ribs were constructed out of plastic rod. I ended up doing this twice having started with 1 mm plastic rod and ended up with .3mm which gave a much better effect
The model is off to Shaun at S&S at the weekend who is going to see if he can modify it for ease of casting then pop a few out to see what they look like. If they are good I will put some thought into creating some of the variants.
References:
Jane's Armour & Artillery 2002/2003
Military Balance 2010
China defence mash up Immages, reasonable set of immages
Scale Plastic and rail 1/35 model review, good immages of the parts
No comments :
Post a Comment